
 |
| Just minutes before getting touched up |
She costed me roughly $21.00 and three days to construct (not including the first initial waiting it took for her materials to be mailed to me)... three, because I didn't have the materials to make her stand up until today, which halted the process of completing her in other aspects not only just to add that finishing touch. So if I had to guess how long it would really take? Probably a teeny bit less than two days.
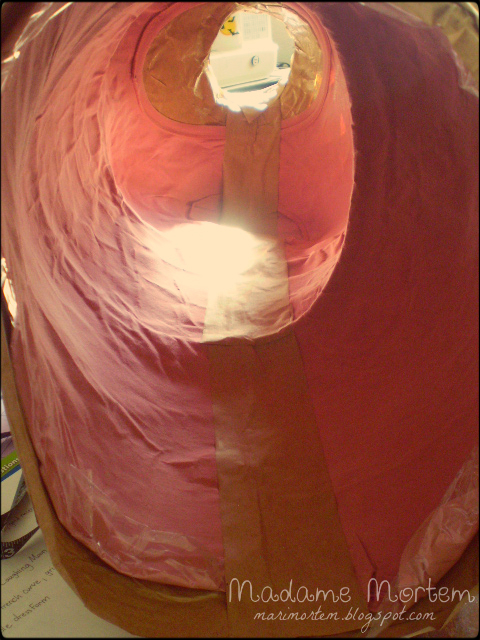
Well hell, I began using her after being freshly cut and dried off my body. Like I said in the previous post, paper tape holds its shape pretty well even without filling and such; it's essentially a lesser form of paper mache.
One of the best things about making your own form is the laughs that come with asking your friend to help you with such an endeavor; doubly so when the aid of your significant other is needed to "grope" and "cup" the more intimate parts as they dry to keep their shape true to form.
 |
| Yarn is just for good measure. |
Another good bit of advice, courtesy of Lulushion? Don't cut any handmade form from the center back, cut it instead from the side. It is considerably more tricky (and requires a lot of trust, especially around the neck area), but it helps to lessen the inaccuracies. Imagine if someone were to cut your spine in half, why you'd buckle and deform, too!
For the stand, I simply used a variation of Lulushion's tutorial on making one with PVC pipe; only mine is not adjustable at all, since I don't think I'll ever grow much even with heels... compensation for a slight height change is easily done, I feel. I also used a hanger and some tape for the upper inner portion.
She was then filled with shredded paper, not scrunched; it fills it up a lot better and gives it a decent weight so she won't blow away with a gentle gust of wind.
Ok, so onto the extra! I have yet another easy and great tutorial-- a supplement to making a paper-tape dress form (or duct tape).
An Integrated Pincushion
Since I have no desire for making her a pinnable cover (because I rarely, if ever, pin to the actual form), I decided the next best thing is a neck hole pincushion.
Materials:
- Left over cardboard
- Foam
- Polyfill
- Scrap fabric; size dependent on size of pincushion/neck hole
- Hot glue gun
- Uncovered neck hole from your newly made form
- The final step to assembling your dressform requires that you measure out a piece of cardboard and top the hole with it before taping over it to seal. Before you get to that step first cut out a hole within that piece of cardboard.

- Then clearly have one mark on both pieces, so you can align them together with no gaps.
- Next grab a piece of foam (sorry no photo of this step) and hot glue it to the inner piece of cardboard you cut-- trim upwards so that no foam is sticking off to the side.
- Plop a piece of polyfill on the top of the foam, and then proceed to place the fabric over it all.

- Glue it on pulling tight as you go; begin by gluing the opposite ends to achieve the best tension (again, no photo of this step--sorry!)
- Once finished, begin to push the pincushion through the ring, aligning the marks. Don't push it all the way through, there should be a bit left behind, like shown.

- Use your hot glue gun to apply glue along that inner edge to seal the two pieces together.
- Then it is a simple matter of applying your "pincushion" to your form as usual.


And you're done! Pretty simple and clean looking (exactly like a mason jar lid pincushion); it also adds a dash of personality to your new form.

Happy Crafting!
Update:
Frankie has been getting some work done on her figure.
I drew as much as I could conjure in such a short burst, but now I've run out of steam; she'll have to wait till I feel like doodling again. For now, I give you Miss Frankie Stein anew.

I am debating whether she needs a skeletal spine on her back...

This is utterly amazing! Thank you for sharing!
ReplyDeleteThanks! Happy you like it =)
DeleteI love the pincushion!
ReplyDeleteI've been meaning to make one of these because while my dummy (named Azzurra) kinda-sorta-maybe has my measurements, she isn't at all shaped like me. It might be time to start asking my sewing buddies if they want to have a dummy-making party.
I had the same fit problems with my store bought one-- the small one didn't adjust properly to mirror my giant butt! Hah
DeleteYou should definitely plan one soon, it's actually a really neat and fun thing to do. =)
"Grope and cup the more intimate parts" ... ok, that was coffee all over my computer. hehehehe ... What an awesome form! Congrats for doing it and having the patience to do it. I ended up asking for one for the holidays. I barely have the patience to sew, never mind make the form! HA! May Frankie be well used and serve you awesomely.
ReplyDeleteHehe, it was much more funny in person!
DeleteI had a store bought one I picked up at the thrift store I left back home in Canada, so in my desperation I made Frankie!
She will surely do during the time I save up enough for a Lady Valet and some form pads. =D
This is a great idea, but I have to wonder about how well it will keep. Does it stand a knocking over?
ReplyDeleteSo far I have tipped and dropped her only when she was hollow, but she didn't weigh enough to become dented. I am assuming that since she is filled with shredded paper rather than scrunched paper that when she does eventually tip over from me bumping into her, she won't be badly dented because the filling it evenly packed in.
DeleteThe areas of concern are "the girls", and while hers were not filled in this manner, having some actual bra padding in there should be enough to deter and "heal" any foreseeable dents.
She's only meant as a means to an end while I save up for one I am eyeballing and hopefully get around to saving up for hehe.
See, I'd be painting it with all the tattoos I can't get without giving my mother a heart attack.
ReplyDeleteHah! That's funny that you should say that, because I was juuuuust in the middle of "tattooing" her! I was going to update this post when I finished all of them XD
DeleteI have a size 12 dummy that I bought years ago and though I'm still a size 12 (roughly), that dummy hasn't sagged in exactly the same way that I have over the years and really isn't much good for anything anymore except to display clothes on. I should probably make one like yours! :D
ReplyDeleteIn a way, I know exactly how you feel!
DeleteI've gotten just a little more round in a few places that just does not fit the average size anymore, hehe.
Plus this is a much cheaper alternative than buying a form and the padding to make it "fit" =P
Well that is a neat idea! I think it would be kind of fun to wrap oneself up in tape!
ReplyDelete