Tuesday, June 28, 2016

Tales of Trial and Terror: A Brief Jaunt Into Watercolor.

Back when I made my Batfit goals for 2016, I included some lofty crafty and creative goals, since that seems to be where my happiness resides-- trying and learning new things!

And now I have a bit of a confession... most of them were written on a lark. Except for a couple of those, I didn't really think I'd do many of them... but it felt right good at the time writing them! Reading them over now, it's quite obvious that not a lot of thought went into that list, hehe; I tried making my goals obtainable... but I guess that only works in cheating myself from the mental growth that should occur.

When I think on it some more, this whole experience was comprised of simple little arbitrary decisions made during the moments they arrived, where I reached the next step as it came rather than a planned route, and suddenly I'm about to attend the first class of Watercolor Painting at the Southwest School of Art.

It started in February all the way into the end of March.
When I began the class, I had silly ideas that watercolor was the easiest of painting mediums... boy, did my bubble burst with a vociferous bang in this class. Granted, I was told our instructor used the most difficult methodology, that being wet on wet application; it was, as he said, the only way to get the charm most of us desire of watercolor. 
It technically wasn't my very first exposure to watercolor; I did "play" a bit with wet on dry not long before taking this class... but other than that I haven't touched it in any meaningful way, and certainly not to the extent to paint a full image.
Now after having completed this class, I found his statements were true-- it did make me too comfortable to learn anything of substance.


The reason he chose to teach this to beginners, he said, was to instill proper technique into people that have no basis for comparison and are therefore not "tainted" by "comfortable bad habits". He claims that wet on dry does not allow the water to play the role it needs to, and consequently forces the artist to be afraid of the water and pigment.

He had interesting ideas about watercolor that I have come to understand and agree with, like how so many of us spent so much time fussing over minutiae. He called that being seduced by the details; likely not an original thought, but it was awful poetic and apt. The cure for this was planning, devising, strategizing our next "move".


For all our preparations, nothing could ease the natural stages of creative work-- I guess it never matters what stage of experience you're at, you're never immune to this. This class was as much a fascinating look into the artistic world as it was equally a ride into the psyche of all who dare beckon the call of creative work.
It really is painful, torture... and all of it coming from these little voices in your head throughout the entire process. Sometimes these voices came out audibly during class-- outside, I bet you'd hear all manner of cursing or slamming down of a paint brush, and wonder why the hell are we subjecting ourselves to this mental anguish?!
Then again, it was an art school...


Our instructor was a bounty of information, and we took in what we could, but the information was so much and we had so little time to absorb it and put it into practice; my only regret was that it went by far too quickly. It was just enough to show me a world where I have long been afraid of taking part in, uncovered a knack I didn't think I possibly had, but so swiftly now over that I crave and yearn to develop this thing!

And I think I may do just that, fall classes are just around the corner now...


Thanks for joining in on my tale of trial and terror!

Wednesday, June 22, 2016

Fashioning My Cyber Microcosm: A Thread In The Weave.

I get the impression from people that I am known only for my sewing, and I get it-- the dominating topic of my personal blog (not a sewing blog) is sewing (ironically). It's not a hard leap to make.

As much as I tout being an avid gamer and lover of things fantasy and sci-fi related, I don't discuss them at length do I? Aside from a little glib on the side bar not much can be seen of my supposed love for anything other than sewing. I have found that my love of sewing underplays my love of gaming, and that my love of gaming underplays my love of sewing.
I think a large part of that is due to expectation and assumption. 
The expectation and assumption that a nerd who sews inevitably cosplays.
It's a logical train of thought, and I won't deny it. 

Khan named for Khan Noonien Singh
I do love these things, I just don't show it in the way many of my ilk do... I know it's a bit queer for someone who spends equal amounts of dollars and hours gaming and upgrading their PC as their craft room to not partake in cosplay... but I get the feeling I let down a lot of people's expectations... frequently, but for the most part inadvertently.

Not that I disapprove of cosplay, mind you. 
I have tried it once or twice to be sure, but truth is my desire to be a certain character is limited to digital format-- to be connected but be assured of the divide between my actual reality, and the reality I've built for myself in the cyber world.
As it is, I spend countless hours simply refining builds, synergizing abilities and subsequently spending even more hours playing, collecting, fussing... is it a wonder then that it can be tough to garner the desire to spend more money and even more time being a character from these games outside the gaming room? Hahah.
Not to mention that it would leave little time for my other avocations, each individually motivated through different themes and different allocations of which I have many of; other expensive pass times, all needing real estate in my brain, all vying for existence in the finite span of my free time and physical constraints! I have difficulty enough quelling this blog of one singular topic! And to be completely frank, I don't want my sewing to be seen as exclusive to my costume making abilities. I want each achievement to shine individually without needing to validate its success and pleasure with something else I do!

....So no... I don't cosplay... but I will gladly sit and play a game or sew with you, whichever you prefer.

Thursday, June 16, 2016

Mortem's Tricks or Treats: Butterick 5566

My visit back home to Canada has come and gone, and now I sit here wide awake nearing yet another conscious visit of the witching hour of the night, picking at tiny but bothersome skin tag on my neck.

I can scarcely believe that just a couple days ago I was having a nice visit with my momma, and celebrating my SIL's graduation with the whole lot of in laws and beyond. While it was great spending time with direct and extended family, I regret that my time was quite limited for old friends-- I didn't get to see most of them, and I didn't get to much the last visit either. It's rather overdue if I wish to keep these friendships.

Before I let myself get too real for a mere pattern review, let us focus shall we?
I found out and was intent on entering a project to the Skirt Contest on patternreview.com; it was days before my departure up North, and there wasn't a lot of time to work with. It's a little funny knowing the fact I scrambled then and now that I should realize that the previous skirt I finished still fell within the qualifying dates haha! I rushed for nothing...

Anyway, my choice was Butterick 5566, after some arduous deliberation.
Unfortunately it was a very recent pattern purchase... maybe a couple weeks old at most from the date I made it.
I landed on view D-E, and cut out a size 18.


Not wishing to further breach my commitment to using up old stash, I grabbed some flocked denim I purchased while living in New Mexico (but funny enough purchased during a trip to El Paso) and the remaining yardage of the suede-ish material from my last project (which I have since finished and worn... though no real time shots of that particular one yet).


In a nutshell, this skirt is exceedingly simple, even with the materials I have chosen which can be quite daunting to work with; I say this with what I consider to be the experience of an advanced beginner, maybe intermediate skill level. So really, there is nothing to be that afraid of when making this pattern view.


I'd say the scariest part of this skirt is the ease, which there is plenty of... and in my humble opinion, way too much at points. Especially on the upper hip. I was worried about this and continued with using my main material anyways without making a mock up... but I did hand baste the ever-loving-crap out of every seam to make sure everything matched up.


I did find that discrepancy that I was worried about-- the upper hip did gape. Thankfully the silhouette is simple enough that I simply grabbed ahold of my hip curve ruler and chopped off what needed removing and blended it out with my serger. Not the most professional way of getting things done, but it did the job.


I was particularly impressed with the drafting of the waist facing, I must say. I haven't come across many waist facings I didn't have to majorly tweak to fit; the only tweaking I did was the weight of the interfacing and adjustment of the upper hip being chopped. Though I didn't mess with the curvature, I just simply took off what I needed off the ends; it seemed to do the trick quite well.
I used a medium weight interfacing instead of a lightweight, even under a woven pant weight like the kind I used.
I like a lot of stability in that area, as my stomach protrudes quite awkwardly if there isn't anything bearing down on it like a belt or some such integrated cinching feature, heh.

I got it done in time, and I had hoped to shoot it and the previous skirt during my visit North as the landscape is much better than I have immediately available down here. Though, since I lacked the foresight to know that my time up there would not be mine... nothing was shot. During a visit to Dollarama with my brother however, I was pleasantly surprised to find some nice shooting equipment, and since the exchange rate was in my favor, for mere pocket change I was able to obtain a selfie stick, a bluetooth remote, a few cases, and a selection of mini tripods. Seriously, the dollar stores in Canada rock.

So now I'm able to do my photos all by myself again and without racing the timer! No more relying heavily on the whim of the hubbubs, and no more guilt trips for having the desire to take and share photos of myself from him either.


And of course, I cannot show and tell without a couple of the McCall's skirt.


I usually allot a couple hours for shooting because 1.) it takes a lot of convincing my hubbubs, almost precisely an hour and 2.) retaking and retaking photos because he won't take it seriously enough. This time I was able to shoot not one but two outfits and I got several very good shots! I was very pleased indeed. The quality overall of each shot is definitely up.
If you have any tips of your own for better shots, please, you're more than welcome to share them!

Till next time my lovely ghouls, spook ya later!

Wednesday, May 25, 2016

Mortem's Tricks or Treats: Practically "Done" Simplicity 1371

In the vague words of Lisa in Stir of Echoes, this top is practically done, which is to say that practically means not really...

I gave you all a sneak peek of this top, and so now I present you:

Simplicity 1371


The top is done, sans a closure to the straps-- hence the practically bit.
This is going to be a long one, so get comfortable.

*inhales*


For this project I used semi old stash, I acquired this faux leather/suede material during my time working for Jill's Fabric & Design in Carlsbad, New Mexico, which at this point makes it a year and a half old stash. Good enough, eh?

I can't actually recall when this pattern was purchased... I now have several Cynthia Rowley by Simplicity patterns, and most of them were purchased in large hauls when I was after another pattern in particular. It's funny because the pattern images and samples of these patterns are all super hideous. Just ugh, why? I know that I bought this pattern for the pants and shorts because up until very recently the thought of wearing crop tops would make me physically ill-- I have that little confidence in my belly's appearance.


I cut out a size 12 in view A. It's worth it to note that this material is not on the suggested fabrics for this pattern, but it worked well because of the nature of the drape; it's not too stiff and not too soft.

In the sample I gave you all, it would appear to be hella short, and have slightly different design features... but I was mucking about at that point; I didn't know what I wanted to do.


I began playing with the myriad of trims I buy and for whatever reason never use, hahah...
The trims and spikes for this top were purchased at Hobby Lobby when they have their bogo trim spools sales or 50% off; they're already super cheap, so the sale makes it a crazy good deal. The rivets and appliques were bought from Joann's.


I must confess something at this point... this was my first time using rivets...
It scared the hell out of me. Luckily I had several sizes that I had purchased earlier since I was hoping to use them in a purse I was planning on making, because this could have made me swear off of them.


If the post is too long, then it might come loose, if it's too short it might pop off-- scary stuff! I gave them a dot of fray check to act as reinforcement, just to be sure heh! They turned out alright!


What didn't turn out as planned is the back closure; this material is too stiff for hook and eye, I wanted, no, needed to use spring snaps. Anything else would look poopy. After eight pair trials, I could not keep from bending the post off to the side. It leads me to believe that either A) I am just terribad at applying snaps, or B) the snaps I currently have are too large for this material, I did buy them for handbag making after all.


The pattern calls for an invisible zipper, which just wouldn't work with this material; the amount of pressure of the material, it would be an inevitability it would break. Besides, this was a great opportunity to make it a design feature as well. As a side note, this is a recycled zipper from the pocket of a pair of pants I bought at the thrift store to gut for notions. Woohoo!


One of my favorite aspects of this top is the fact that I was able to make the inside look just as clean on the outside as in; considering all the seams and hand stitching I needed to do on this. I did however overlook a zipper flap, I might go back in and add one but I have tried it on and didn't notice the zipper in the slightest. Must be the location and size of it.
I'm getting quite obsessive about having my work as clean inside, just as out... weird. That's something they don't tell you, as you get further into your sewing progression, completionism becomes overwhelmingly strong; it happens in gaming too...


So that's it! When I get some proper fitting snaps in there, I shall wear it in a completed outfit hehe.

Till next time! Spooky ya later.

Thursday, May 19, 2016

Mortem's Tricks or Treats: She's ALIVE!! ... and Sewing.

My, my my...

It has been a while, hasn't it. 4 months said out loud does not sound like long at all, but quite a lot has happened in that very insignificant blip in the cosmos...
Well this insignificant blip has certainly taught me a lot about myself; too much to get into for now, so let's appreciate this "rest stop" on a journey of self discovery I have inadvertently taken.

Ah, such is the mortal coil-- growing pains never stop, no matter what your parents say (they should really know better than to spread such a fallacy, tsk tsk).
Thankfully, I am a person with a decidedly cathartic outlet; a hobby... or more specifically, I have my ability to sew to ease the ennui.

I am progressing nicely in my goal to change the fabric I work with from spooky cute to spooky decadence; it's a much harder transition then once anticipated since Halloween prints pluck beautiful notes on my heart strings. However, I haven't done good by my to do list of patterns to sew, I seem to have found myself yet again at a deviated point...

I stitched up yet another skirt, because they're quick and I am very much lacking skirts with the right length for the weather here in Texas which has been irritatingly humid and hot... or just wet. No in between.

Unfortunately I didn't use any stashed supplies or patterns; these are all recent purchases made in the last month or so. This is McCall's 6706, and I used a black brocade satin.
I used View C which is the hi-low hem option, and cut out a size 18.


It turned out alright. Other than the side seams and zipper, this one is fairly easy to put together.
While the side seams and zipper were of no issue to myself, I can foresee them being an issue for someone else-- unless one is not particularly finicky about a clean finish.

In the above perspective you can take a gander at the side zipper and hook eye opening of the waistband; I was particularly happy with how it turned out because they came out exactly as intended-- almost seamless. The zipper is lapped, and originally I thought I could somehow get away with making it an invisible zip since I hate doing lapped zippers lol, but it just didn't work.


The way the box pleats are drafted into this one is designed so the side seams and consequently the zipper lie on the inside of them, thus becoming hidden. My initial experiment with the invisible zipper revealed one little flaw in the instructions, wherein they say to stitch up to the dot-- the dot being the point where you will insert the zipper. If you're not careful at the insertion of the zipper which comes before creating the pleats, that seam can create a very wonky look to the entire pleat. It has to be as close to perfect to avoid looking poorly made.


My solution to this was simple, make sure you haven't lost track of the dot, and stitch it all the way up back stitching at the dot. and continuing. Insert the zipper onto the seam allowance, as you would with any lapped zipper technique, and once inserted, very carefully pluck the seam open up to your back stitch. Voila, seamless and pretty darn near to perfect.


The skirt has fantastic body with this material-- there isn't a petticoat under there, it's awesome naturally. I also didn't go loco on the embellishments, as I was rather hoping to use this as a staple skirt; I could potentially whip up a bustle belt for this, or pair it with a very frilly blouse. To keep it in this way opens up a lot of outfit possibilities. Plus it really lets the pattern of the material to really blossom on its own.

And so my curse resides, heroes...

Hopefully I'll get around to posting about this sooner then later, but in case I don't, here's a sneak peek at what is currently brewing in my creative laboratory.


Till then, my lovely ghouls.

Thursday, February 25, 2016

Spooky Basket: Small Solutions, Big Differences.

I know I haven't been sewing much lately, but that doesn't mean the acquisition of new sewing gadgetry has halted. In fact, it would be much the opposite... it seems the amount of buying such finery has reached "plunderer" levels of audacity.

To begin, back when I purchased Ophelia, I had a nagging suspicion that eventually I will either gain lots of weight or sustain it, so I preemptively bought the Fabulous Fit kit along with her. Funny enough, I had lost enough weight after the initial post that I was a "model" 12 all around and sustained it up until this point-- so my pad kit just sat in my closet taking up $75 worth of space (ouch) in the meantime.


"You sure about this, momma?" "Momma, these smell funny"
There was a bit of confusion during the ordering; choosing the size for the dress form, because some people say get it according to how much you want to increase and the box says to get it according to the dress form you currently have... the former sounds more correct to me from the perspective of increasing to get to a certain size. I don't know, but in the end I took my advice from those who've tried it... and it still ended up being the one recommended on the box: I have a size 12 dress form, and I needed to increase below the waist up to a 16-18, so a size medium set of pads is what I purchased.


Let me just state that you need a partner and at least an hour and a half to play around with these pads... because they can so very easily go awry with the wrong measurements and a biased perspective. I learned that I thought my butt sat a little higher and a little bigger than Ophelia's: this was not the case, though I wished it was ahahah! I thought the front of my thighs were a little larger, also turned out not to be true. The only thing that my eyes saw correctly was my stomach pouch, or what I like to call the "fanny pack".


It turned out to be the only pad I needed to place onto Ophelia, fancy that. Seems like a waist of a nice kit (*rim shot*), but if it'll get me the right fit I'm happy. These pads seem generally very handy should I ever have the need to custom fit someone else, so I am not entirely critical on myself for having spent the money on this pad set that I don't think I will ever use in its entirety for myself. Honestly, though... if I didn't see future use besides fitting me alone, I would have just given her the ol' Frankiestein mod job.

Take from my experience what you will, but I say if you've never found a dress form that fit at all right and your fit issues are quite extensive, then this is a great set for you to address it all on any dress form you have-- it even fixes some vertical fit issues like high or low bust line points and dowager's hump for example. For people with average body sizes like myself, that your variations are only inches apart from the form but everything sits relatively in the right places, best just to stick with padding your form up with batting, because it's still accurate but vastly cheaper.

Next items are pattern material and a roll-a-pattern rotary marker.


The usefulness in these is appreciated by those, like myself, who find the idea of cutting into master patterns shuddersome-- if you're cutting at a small(er) size, the larger sizes go to waste. Sure you might've only paid a dollar, maybe even less... eventually there will come a time when you no longer want that pattern and you could pass it on in pristine condition; one day it too will be considered vintage! Not just that though, no one ever stays the same size throughout their lifetime... but a favorite pattern might remain a favorite decades later, so it's nice to be able to accommodate for any changes easier with the range of sizes available on the pattern.

Anywho *steps off soap box*.
I purchased these from Nancy's Notions as a bundle here, and it is about the only place I know that offers a decent amount of pattern material with a handy marker tool for such a great price. Most other places offer the material by the yard/meter or in 25 to 50 yard bolts for exorbitant amounts.


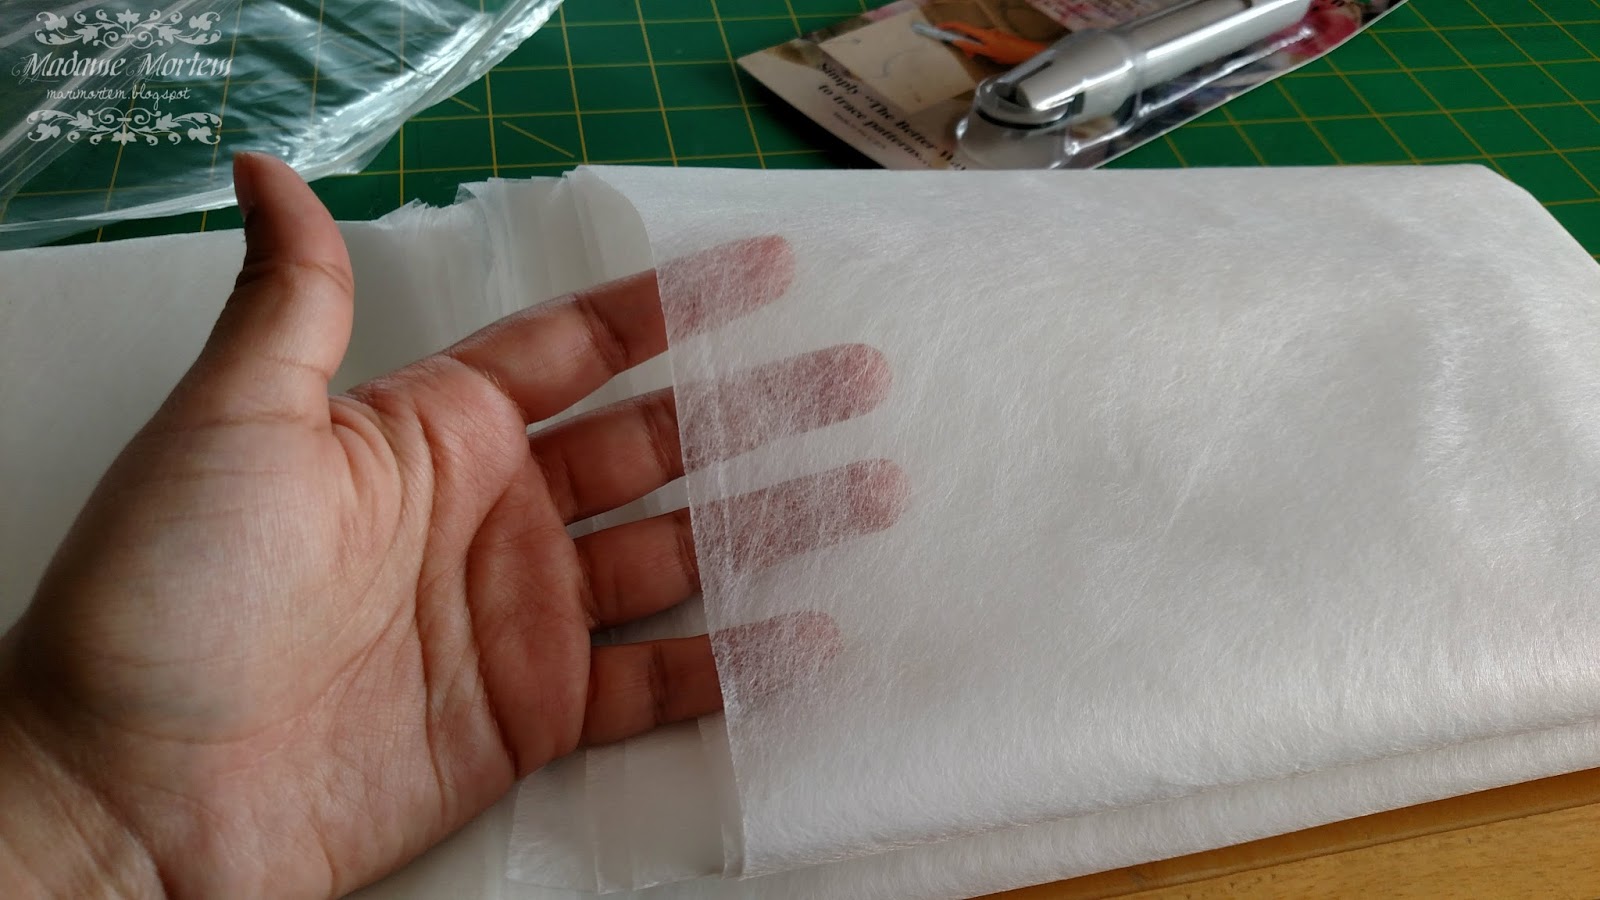
Seems like the kind of thing that should be even cheaper than muslin and even batting, and yet it isn't in most cases for whatever reason. It isn't stronger than muslin, it's more like dryer sheet material though it is still strong enough to endure some pretty rough handling and pinning heaps better than paper tissue in comparison; it is still see through for the purposes of copying a pattern with much less hassle than using a tracing wheel with transfer paper onto muslin. I now use this for my final drafts after I finish all revisions from my master patterns, but will continue to use cheap gift tissue paper during the redraft/redesign process since it would not be nice to waste this material, hehe.

I haven't "officially" used the rotary marker, though it seems like a pretty ingenious little trinket.


I like that they made it refillable, because I would hate for this entire hunk of plastic to be disposable-- though I got the very bottom of the marker bit off and revealed the felted ink well bit inside, so I wonder about the possibility of "filling" it back up with ink when the time comes to replace it.
I have played with it a bit on a pad of paper, and its got a very gentle flow of ink, doesn't need much pressure to get a very crisp black line; I worry that the ink will bleed onto the master pattern with such thin pattern material, which is why I haven't actually used it yet... though that could be because it's still so fresh from the box. That could change as it begins to run/dry out.

Next items are the notions that just didn't make my cut; I tried and tried and they just don't deliver for me.


It looks like three but it's really two and a half.
The bottle of fluid and "pen" is a fabric folding pen by Clover; it claims to do precisely its namesake... fold fabric (without the need of an iron).

I read and reread the instructions, looked at different online video demonstrations but none of it seemed to make this pen and its fluid work, and I wasn't using anything too different from cotton. Maybe my batch of folding fluid is faulty or maybe it's just that it only works on cotton and cotton blends, heh.

Next is another Clover item, which disappoints me because I am typically a fan of anything from Clover. This one is even on Nancy's top 10 notions list! It's the Clover desk needle threader. I have a vintage one I bought from the thrift store oh so many years ago, but it's green and this is purple... and you know me when it comes to purple tools!
Later I find out the brand of the original threader I have still exists in some shops and even comes in purple! Here. Seems like a hefty price to pay for a simple needle threader that I already have, but I live by my 1950's INFILA... it would great to have it in purple, haha!

Unfortunately, this Clover one is more trouble than its color is worth. It doesn't give me a range of needles to thread unlike the INFILA; larger than a size 5 sharp doesn't even fit into the slot. On top of that it only threads oval eyes, which is fairly typical for hand sewing needles, but there are round ones out there and on the off chance I get them I want to be able to thread them quickly too, heh.
I like using Bohin's size 8 sharps for my basting and hand stitching which seems just small enough that it doesn't always catch and thread that needle in a jiffy. The range seems to be between sizes 5 and 7. For how much it costs, it's not worth it at all unless of course you stick strictly to the sizes it can thread, as someone who has a wide range of needles for various purposes it just doesn't cut it... but it's cute nevertheless.

I really did want these to work because I like the idea of them quite a bit and would definitely use them if they worked as advertised and/or had a wider range of use.

Till next time, my ghouls!


Monday, February 22, 2016

Mortem's Tricks or Treats: Simplicity 8019

Since my last post, I have begun to experience what others have dubbed life.
I am actually living, as any homosapien must do-- it's exhausting and wondrous... and of course expensive, heh.
The life of a hermit has not been entirely for my benefit, though I did live exceptionally comfortable and embedded within my means.

The most exciting though of all the happenings is the joyous and infinitely desired news of all, news of my mother's official remission! I believe we've doused ourselves with a healthy dose of hope after that. We're drenching ourselves in all the relief that is possible for such news, while still having two feet planted on the ground about such matters.

That being said, with some emotional weight off my shoulders, and as little as the year progressed, I have been able to make leaps and bounds with my bat fit goals already, but I wanted to break this little pause I've taken from blogging this time with the one and only sewn project I've done for what is now behind us in the current year.

That's right, I've been up to my ears in things to do that sewing has actually taken a back seat... for now. So sewing productivity may be down, but it is certainly up in other equally important affairs.
What began as a simple visit to the fabric shop to find something for my pattern, literally turned into an opportunity for work-- but before all that, it was the simple gesture of revising my sewing list that was the catalyst to what is now yet another way for me to give back to the shop I now work at all the money I earn from it hahah!


I figured I better adjust what kinds of garments will be on that list, as I estimate by the time I get to finish all of them I might be well enough into the hot and humid summer months that anything for cool weather will be a completely moot point; the hot weather lasts just too long here, and I'd hate not to be able to wear what I finish right then for that length of time. Two of the patterns have been with me since the time I lived in Hellbrook (aka Holbrook, Arizona)-- it's about time I start working from where I started with this now gargantuan collection of commercial patterns!
Anyway, even from my own point of view I sometimes ponder how my brain functions; making a list is a methodical thing to do... and yet, somewhat surprisingly, I didn't start at the beginning of that list.
In a very similar fashion, much of the inner machinations of my creative laboratory work much the same way; I can't begin with a chaotic space, so I first clean every nook and cranny before every project... yet during the process I don't quite mind the torrent of scraps and thread strewn about.

I digress (immensely). I started with a retro reprint of a button up skirt: Simplicity 8019; originally printed in the 70's, and reprinted sometime in the past year or two. It took a while to get this one done, in fact it wasn't officially "done" until last week! Talk about procrastination; for myself, that is a highly irregular pause between start and finish that wasn't deliberate. I called it done before actually being so, because I had simply but to sew on buttonholes and buttons to call it complete.

At first, a halloween print was crying out to me... but I remembered one of my bat fit goals; to ease up on making everything from Halloween prints and use more "mature" fabrics, as was once the case. I took to the fabric store and found a beautifully (mature) purple and black plaid. I found some nice black buttons that I assumed I would still love by the time I got to that point. This was not the case.


I cut out a size 14 at first which brought me to the realization that I gained weight; so I graded up to a 16-- still not quite enough. Finally, I landed on 18. I wanted it in view C which was a midcalf length, but on me it would look more like D-- I had to go all the way up to A for me to have that mid calf length I wanted, with some of the bottom hem unused for just a touch more length to make it right. Yeesh, I'm short!

During the process of matching my plaids up on my pattern pieces, something stopped clicking with my choice of buttons; I no longer wanted these black with crystal rhinestone ones.
It felt at that moment in time, like a frenzy had overtaken me... and before I knew it, I had purchased dozens of new buttons in an attempt to satiate whatever hunger overtook me.

What inevitably won were little metal skull shank buttons that I failed to properly take a photo of. I guess I wasn't fully over the concept of adding some Halloween flair to my stuff!

I put off sewing on the buttonholes until I was sure which buttons were the "perfect ones", because it was no longer an easy task to pop and sew a buttonhole; I decided to take the plunge and try the contraption I was so afraid of using since its acquisition; my Singer Buttonholer.

I'm not gonna lie, this thing is as scary to work with as it is to look at; I broke four needles just troubleshooting it with the machine, heh... but once the trial and terror part was over, I was able to produce the best buttonhole I have ever witnessed made!


I was a lazy bum and didn't contrast the thread for your guys' sake, and yet clearly there's a huge difference between the top, which was made with my Brother (not unlike many other of its ilk manufactured after the 80's and forward), and the bottom which was produced with the singer and the buttonholer gadget. The only problem I've noticed is that the keyhole templates don't go any smaller than 7/8th's of an inch-- which is the benefit of the sliding buttonhole foot of any everyday machine these days: any size, any time, quick, painless, and sufficient for most needs.
However, I needed something with a little more umph for this project, since the design and weight of the fabric would swallow up the button holes my Brother made.


Back to the pattern, it was very easy to dish out; I sewed two others up as a mock up before I got to making my final garment. No significant adjustments were made-- any width sizing issues I had were simply because I was trying to shortcut my way out of actually having to remeasure myself for all the weight I gained hahah! The vertical length was something I simply wasn't paying attention to when I made the two mock ups before the final one; so really pay attention to that finished length measurement on the packet. I know it seems obvious to mention it, but a lot of people including myself tend to gloss over it, heheh.  Next changes made were simply design changes,  I extended the grain line markings so it would be easier to match my plaid, and to create a directional focal of the waistband.


You'll have to excuse the wrinkling-- another momentary lapse in foresight. This was moments after a cat nap after work in my clothes and on my way to class! Heh.


The top button looks so misshapenly sewn in this photo, and yet this was the best shot I got of the buttons... still hard to see them. Boo! I wish I still had a functioning camera, instead of my phone. Seems like the kind of thing I should invest in.

Till next time, my lovely ghouls!


Related Posts Plugin for WordPress, Blogger...