Sunday, August 16, 2015

Mortem's Apothecarium: A Hairy Situation.

Lots of things have been happening.
So much, that I am deciding to trickle it throughout the subsequent posts so as to not overwhelm my blog with too many of my life updates. Plus I lose a lot of writing steam when I make the posts too "private life" specific.

It's been a while since I posted in my apothecarium, I've been taking a short break from my sewing since the first projects to come out of my awesome and most fabulous sewing room were two of those dreaded totes I kept making in New Mexico. How ironic that one of them is made with Cowboys material, though they're both shipping back to NM...


I hope they're the last two I'll make in a really long time. These make my 9th and 10th totes, and if you know me, you'll know I absolutely detest making something that many times... but I am a people pleaser, and if I can make people happy then I am quick to say yes.
I am often asked how I don't burn out sooner from sewing, it's simply because I keep my projects fresh and new. When I don't, I do burn out as thus.

Anyway, Texas has taught me a lot about myself in the short month or so... like, I never knew my allergies could get any worse than they were.
It's been so bad that my entire body was thrown off tune. I was exhausted everyday, though I don't even have a job except to keep the house tidy. My eyes burn, my skin itches and I sneeze all. The. Damn. TIME. With being so exhausted, and not feeling so attractive because of it all I have really neglected my image.

So I began tackling my problems one minor symptom at a time, starting with my hair.


The most I did/do with my hair these days is throw it into a tail and make pretend beards with it...
It was all I could do! Something in my body was whacky!

Though it seems that by saying something went whacky, I suddenly grew hair in odd places... no, it is not so, heh. My hair was oily. Not in the "starting to look a little rough" kind of two day oil, but in the "Did one of BP's carriers have an oopsie on your head?!"

Call the clean up crew, this one's a doozy
It was clunky, chunky and really dang gunky. Washing my hair everyday only exacerbated the issue, as one might assume... but I was desperate. I felt filthy even after I had showered. I tried an ACV rinse, but even after 2 weeks it did nothing. So I tried letting a couple days pass between showers, and it started looking like that might work. It wasn't quick enough, though-- I was self conscious every time I stepped out the door, which in turn amplified my already severe social anxieties, and low self esteem.

While at Sprouts I took a detour to try and find myself a clarifying shampoo, because I've done the whole adding essential oils into my shampoo and I just didn't feel like going through a very cluttered tiny bathroom/shower again. I know a lot about the clarifying effects of tea tree oil, so I had a general idea of what to look for. I took home a bottle of Nature's Gate Tea Tree shampoo omitting the conditioner, since conditioner on an oily scalp is not typically recommended during a cleanse.


I never used Nature's Gate before, never even heard of it till I went looking down the aisle, and I only briefly read the reviews on my phone before buying it.

It is amazing. Simply amazing. After one wash the oiliness was reduced greatly-- I had a single grease spot near the nape of my neck (which has always been my trouble spot). Second time around, my entire scalp was clean! Success!
Although, because I haven't been using conditioner in the shower my ends have been rather thirsty, so I started using leave-ins again just around the ends-- I am currently using Palmer's coconut oil hair milk.


This combination has been working pretty awesomely. Plus my hair is all levels of wonderful smelling, too. Who knew tea tree oil and peppermint complimented coconut so well?

I didn't want to go back to showering everyday, though I wanted to-- the tingly and clean sensations of this shampoo are addictive.
I am still very much about water conservation here, so my research extended into dry shampoos. I admit for the sake of my wallet a bit, too; spending $10 on a small bottle (I might add) of tea tree shampoo, and $9 for the conditioner for my amount of hair is going to prove expensive in the long run if I don't make the most of each dollop of product in these bottles.

I was looking for a more simple ingredient make up for dry shampoo brands... but my visit back to Sprouts for that yielded a unanimous 'hell no'. They were expensive-- yeouch. My research then took a U-turn into DIY, as it tends to do when faced with a predicament like this.

I found the most common recipe for a homemade dry shampoo is arrowroot powder with equal parts cocoa powder for darker haired maidens. However, and this is going to take away some of my Halloweenite points, but here goes...
I didn't fancy the idea of my hair smelling of chocolate.
... I know, I know!
Chocolate belongs in my belly, not so much my head...
I began altering the recipe using essential oils that not only benefit my scalp, but also overpower the cocoa smell.


Patchouli and Eucalyptus. Yep... they certainly did the trick. I mixed and mixed till the powder was pretty much infused with their scent. I then sifted the powder to take out the chunks of resiny patchouli, and my mixture was done.


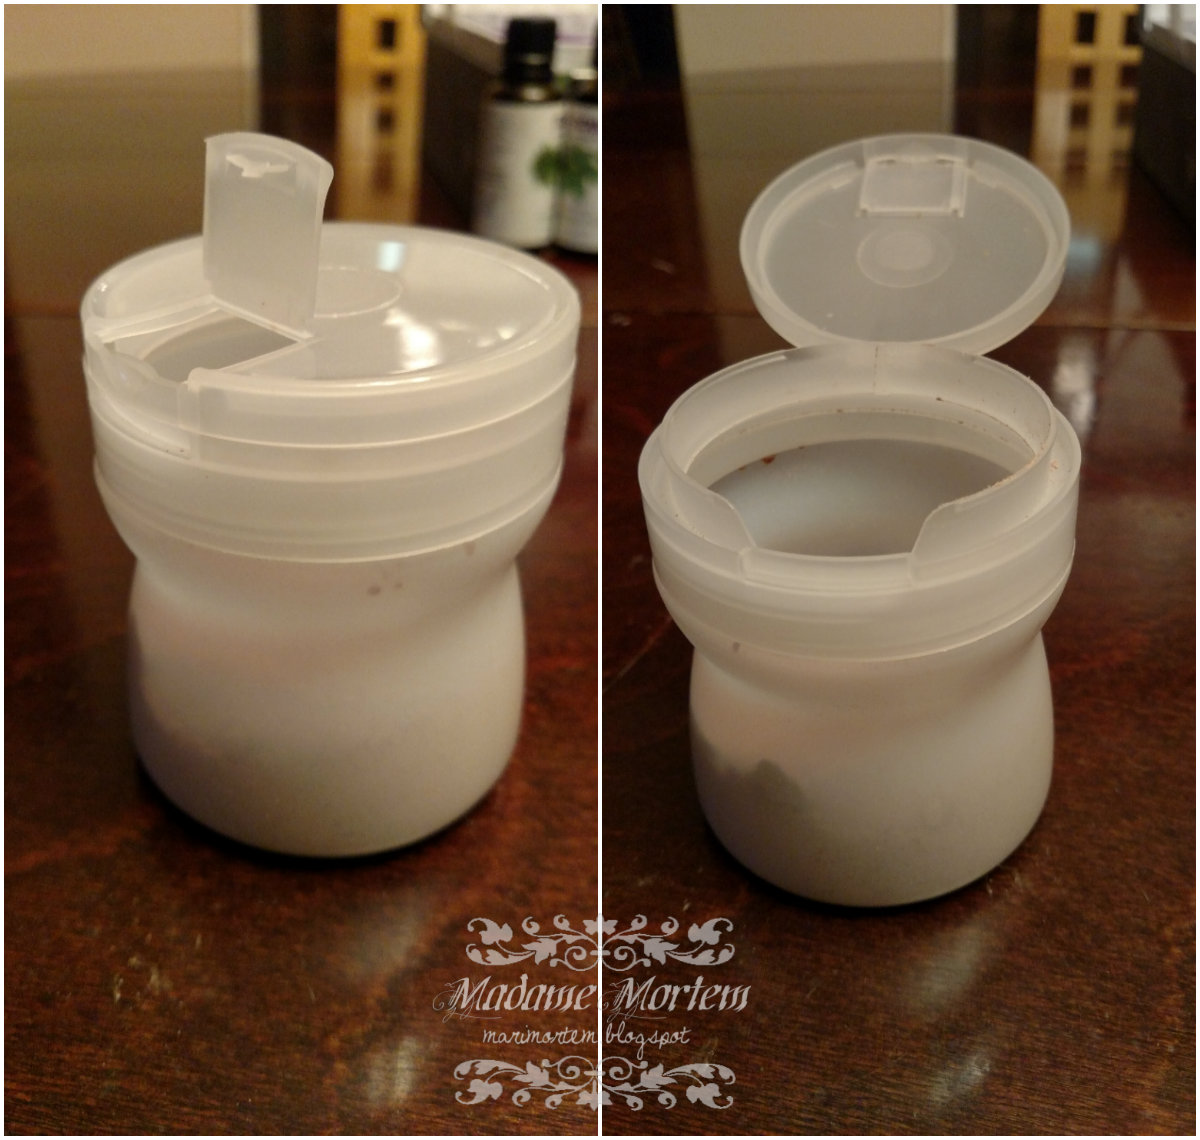
I cleaned out an old gum container to store the powder in for use. It's actually pretty handy, those little containers-- they have a spout for small deposits, or you can open the big flap. I bought a $3 brush from Wet n' Wild to apply the powder to my head, because sprinkling it onto my scalp posed a challenge of applying too much on my floor sometimes...


I applied it onto 4 day hair, which was surprisingly not as greasy as my second picture (that shampoo is magic). It gave me a glimpse of what I may look like with greying spots, and I actually kind of liked it. I have always thought greying patches on people look ultra fetching and distinguished-- here's looking at your greying doll's out there! You make my heart swoon.

The results? Even more surprising...

That's 4 day unwashed hair? WUT?!

I think I recovered a bit of my spark again.
I've been playing around with a lot of really easy and cute styles-- I might just go ahead with my intention of posting a list of my favorites, too-- and they are easy, I promise... take it from someone who can only make a barely passable bun and braid, heh.

Edit to add:
I feel like a putz, I didn't write in the recipe for the altered powder!
I made a tiny batch, but it looks like it'll last  me a month when used in conjunction with the brush; minimal waste, maximum coverage.


You'll need:

  • 1 part arrowroot powder-- 1 tbsp
  • 1 part cocoa powder-- 1 tbsp
  • 2 parts parts patchouli oil-- 8 drops
  • 1 part eucalyptus oil-- 4 drops
You'll mix it with a tiny whisk for 10 mins, and then sift it into a container of your choosing. Brush onto oily parts of your scalp and let sit for 5 mins before brushing it out. Look into mirror and admire!

Saturday, August 1, 2015

Fashioning My Cyber Microcosm: San Antonio Rose-- A Lengthy Update.

Well folks, it took a while... but I think I might actually be settling in finally.

Home, sweet Texas, home!
I admit, when we reached the state line my mind was flooded with visions of good barbecue and dearest Patsy Cline, hahah. I ached to hear a deep Southern accent-- I might be fool, but I actually like it quite a bit. Sadly, the only accent I got was a mild one from our Dish cable guy, heh. Plenty of time for that, I suppose.

For the first week we lived without all of our stuff. It was actually pretty rough-- I got mad carpet burns on all the weirdest places since we didn't have a stick of furniture yet. I know it has only been a year since Arizona and having carpet, but our house in New Mexico spoiled us... I forgot about the drudgery that comes with the territory. I have short term memory when it comes to that sort of thing.

The biggest conundrum was figuring out how to fit a very large house and all its contents into one kinda-cramped-apartment.


When our stuff arrived, the house looked pretty much like my sewing room did. The only space available was the space you needed to maneuver the chaos, and the only storage available was an outdoor closet on the patio, and one near the front door, both making up less space then the side bedroom closet.

Inevitably, there were many, many... many... visits to the thrift store to unload the items that we were hoarding, or no longer had a use for like garden tools. To think, we gave up quite a bit back in New Mexico-- I can't imagine how tight things would be if we had kept it all.

Despite all those trips, we still had to get a little creative with the space available to us. One exciting aspect I was looking forward to was that somehow, some way, I convinced my husband that my sewing room would be better suited for the master bedroom, and he agreed! I am glad... because in reality, it did make the most sense, since we don't typically spend a lot of conscious time in the bedroom; all we had was a bed and a dresser-- the space would have been very underutilized. Plus, it was the only bedroom with more than one window and an overhead light... which I thought was very odd.


As of yesterday, the sewing room is finally up and ready for action! I haven't ever had the pleasure of a sewing space this large all to myself-- it's quite a treat!


It might require re-tweaking where I have placed all the items and things, but I am thrilled beyond belief. I have complete tables dedicated to my machines, my cutting space... and one of two of my most proudest additions... *drumroll*


A large rectangular ironing board with storage underneath! My husband and I were heavily debating getting rid of this once shoe cubby, which we had two of... and then it hit me: I gave up my ironing board, and I have always wanted to DIY one of these things since first discovering the project on Pinterest. It was just the right height to pull it off, so off we went to Home Depot and Joann's to pick up everything we needed to slap this together. The top is completely detachable, but fits very snug onto the cubby so that it won't shift in the least when on. I bought some fabric drawers from walmart and viola!

Since our main bedroom was now in the second bedroom, I could not dedicate the closet space to just my fabric...

The image doesn't do this closet size justice, as we were able to fit our gigantic 5 foot long solid wood dresser on the other side. Naturally, it still swallowed up a lot of the space... but I managed to fit a "little" portion of my fabric stash on the side presently shown. The lesser yardages of fabric remain within several xerox boxes atop the dresser inside the closet.


The rest of my stash (that wasn't put onto bolts and couldn't fit into xerox boxes) had to go underneath the machine table. I actually do think I have a fabric addiction; it's easily triple digit yards of fabric, but I really don't want to let go of a single yard lol...
I guess you can see why I have had a sense of urgency to bust my stash lately, with the equal triple digit amount of patterns I have acquired.

I can never claim to have nothing to do till my 50's.

And now, the pièce de résistance...


Meet, Ophelia... ain't she a vision?
Unfortunately, Frankiestein had to retire. I was honestly surprised she made it as far as she did, but she could not endure yet another move. Truth be told, if she was carefully packed, I would still be using her... but she suffered the indecency of poor packaging (or none at all, in this case). I was truly devastated about what happened to Frankiestein; a lot of love and work went into her, so while she is no longer going to be used to sew, she will remain a nice thing to look at once I pop out all the collapsed bits of her.

Ophelia is beautiful in many ways, but being as perfect as she is has made her inherently flawed... in that she is too perfect to be me, at the moment. Most of my body is a size 12, but places like my bust, hips and derriere (places that matter when it comes to fit) are 14-16. I had to purchase the Fabulous Fit pads if she was to surpass her predecessor.
Like Frankiestein's name suggested, every single aspect of her was patched together, including when I had to pad her up in size. I am not going to do that with Ophelia; even though Ophelia was a bargain compared to most professional dress forms, I still saw her as a huge investment that I want to last longer than Frankie, so I opted to go the whole nine.

You read right, Ophelia was a bargain. Honestly, how affordable she was gave me the opportunity to  purchase of the Fabulous Fit kit along with her. You would definitely not think it to look at her


While looking for opinions from some of my favorite sewing bloggers, sifting through all the reviews at different shops, trudging through forums... I wasn't convinced that a household dress form was for me anymore. I take my sewing seriously now, and I felt an undeniable urge for the next step; I began searching professional dress forms. During my search I came upon LLady Bird that reviews a dress form from The Shop Company; I am very jealous of the fact she received hers for free, I wish that kind of thing happened to my blog *hint hint* hehe. It then lead me to Gertie's post about the same dress form from the same shop, where in it she offers a coupon that still worked (it still does, as far as I can tell). It got me to seriously thinking about taking the plunge...

Indeed, The Shop Company does offer some pretty competitive prices as the two bloggers have stated, however, I am a bargain shopper and "shopping risk taker" by default; somehow I felt like I was able to get a slightly bigger bang for my buck.
I searched other venues for a potentially cheaper price for the same product. Trust me when I say, I don't take my risks lightly... the decision to purchase from Fashion Display on Amazon was made after a ton of deliberation (and one sleepless night). Fashion Display has a horrid return policy, stating a 35% restocking fee along with cost of shipping back being up to the buyer... but the form was $50 less than TSC's and $30 less than the current sale at Roxy Display's site. It came with a complimentary arm that TSC does not offer but Roxy does.
A savings of $50 doesn't seem like much when you're spending this amount on something... so it seemed like an unnecessary risk to take, but go see the cost of good thread alone and tell me $50 isn't anything, haha.

Cast iron base, cage intact.
I spent the subsequent days after making the purchase anxious if I had made the right decision. When she arrived Friday, I was stunned that my gamble had paid off. She was perfect. The instructions to put her together were a touch confusing, but a video on Youtube quickly demystified the process.

What is so shocking to me was that she cost exactly the same amount as one of those Dritz forms from Joann's if you were to ship it from online. She is not a huge jump in price even if you bought a form outright from Joann's storefront. Crazy!

Other than all the updates and additions to my sewing room, things have been fairly status quo considering having moved to another state. The cats had a little trouble adjusting to a much smaller place-- Poe was suffering a rash due to allergies and anxiety, and Khan had an ear infection (which he is prone to when stressed). They're both doing really well now, and their ailments have cleared up after a visit to the vet-- it was such a wonderful place, too, such caring people! The cats took the treatments like champs, not a single fuss was made.

Things are really great here in Texas so far, and I can't believe how many choices there are for craft and fabric stores!

Expect to continue seeing much sewing madness!
Spook ya later!

Tuesday, June 30, 2015

Fashioning My Cyber Microcosm: 27 Things To Do Before 27... Oh, wait.

June 24.

The day that officially marked my place on the slope where one is no longer considered a "young adult".
Or at least, that's what social media would have you think.

Some people are scared of this turning 30 thing, like that's when all the "adult stuff" really kicks in and you won't have time for adventures. The thing is, I don't feel like my adventures are going to stop suddenly because I'm 27... and I am not one who avidly seeks thrills of any kind. I like things quiet and predictable... but that rarely happens.

I was planning on spending my birthday alone playing my games, and eating corn dogs; my hubby was away on business, and I had all that time to myself.
Well, my colleague ended up taking me out to a dive bar where we soon discovered is was karaoke night. We didn't sing, but there were a number of colorful people who gave it their best... to say the least, heh.

Come the weekend, my hubby returned home only to take me out to White Sands national park.


I have never seen any sand dunes before... and White Sands was quite a sight.
It had rained the previous night, so there was still some initial cloud coverage-- the sand was cool and refreshing... and so easy to build sand skulls out of!


One of my few temporary contributions to the dunes... I failed to take a picture of my rabbit on a platter, my beetle, and my spider. Maybe someone out there came upon these before the sun dried them up, and wind blew them away, heh.

That tiny figure back there be my hubby.
I could not have had better weather to visit-- they say it becomes too unbearable to enjoy during the summer, but because of the storm we were able to stay out and enjoy the sand for several hours. We saw a few people sledding on the slopes... it made me wish we had a sled to do the same, but lying back on the sand felt like a good consolation.

You'd never guess that these vast white dunes is just past mountains covered in green aromatic pine.


You can juuust make out the dunes to the right of this panorama, if you enlarge it-- the weather changes from pretty cold to pretty hot in that short distance. Nature is wild.

When we started our way back through Cloudcroft, we decided to stop, do a little exploring and get some lunch. 


A town whose mainstay is pine, cherries, and some damn fine Texas style barbecue. There is something about these sleepy towns tucked away in the woods that makes my heart flutter. We ate at Mad Jack's Mountaintop BBQ... and I just gotta say, I never had bbq that good before, and I love bbq. The smell of the smokers lured us in, and a lady in the line kept us there. She told us how she never goes anywhere else for her brisket. 
She was right. After having a simple brisket sandwich with a few jalapenos, and some awesome mac n' cheese, I wouldn't want to go anywhere else either. I washed it down with some black cherry soda and a cherry cobbler. Mmmm.
Mad Jack buys his meat fresh, and in limited quantities so when he sells out, there's no more for the day.

All through the drive, it felt like aromatherapy... the wet pine gave off an almost sweet and fresh smell, I could not keep my window closed-- even though I was cold as hell. I only packed warm weather clothes for the dunes...

I really wish I had found out about all this before moving so far away...
Just today I hear of Sitting Bull falls, just outside of Carlsbad. Damnit all.
My hubby never tells me anything... only when we're just about to leave...

I wasn't able to kick off my one pattern a week because of this weekend getaway. Not that I'm complaining by any stretch. I was able to cut and make some quick adjustments to the latest pattern: McCall's 6887. I am cutting out view A, and drafting in a peter pan collar.


I have my fabrics all chosen. We got in some cat fabric at the shop... and that got me to thinking; I need a cat dress. I chose a black sequins material for the collar, which I will embellish with pyramid studs. The only thing keeping me from completing this dress quickly is the rather troublesome need to shorten that open-back-princess-seamed bodice. I just haven't had a chance over the weekend to really tackle it properly, though perhaps my quick adjustments may have done it... I still have to make up the mock to see for sure, but the tissue fit looked ok. 

I got pretty excited over my Joann's haul when I visited San Antonio just the other night-- I bought many of Simplicity's retro line. I busted many of my retro reprints out because... because I could.


I am very likely going to make up to-do list for this pattern a week endeavor of mine. I have so many cute halloween prints to make all of these up, and then some. Perhaps in the subsequent post, I will feature my intended patterns on a month by month basis. I am very excited about this!

Yet another thing to be excited about is Professor Z's currently running contest. It ends on the 4th so enter quick to have a chance at winning Gertie's Book For Better Sewing!
I haven't been following Gertie, but if her Butterick collection is any indication on the amount of awesomeness she exudes, then I'll quickly become a big fan.

Spooky ya later!


Sunday, June 21, 2015

Mortem's Tricks or Treats: The Galaxy is on Mortem's Dress-- New Look 6020

I used to be fairly proud of the fact that I haven't touched or owned a commercial sewing pattern during my journey through sewing self tutelage.

That is no more.

Yes, long are the days gone when I had and took the time to do all that self drafting nonsense-- all the aches, and pains of the ample amounts of trial and error.

Now, I am sitting on approximately 201 commercial sewing patterns, all acquired in the past 2 likely 3 years... and the collection just keeps growing. I don't even think I have that many repeat styles... I think...

It's like an infection that stays inflamed, and it's especially hard to ignore once you start seeing the pattern behind the annual $1.00 sales.

Last week, while we were in San Antonio looking for an apartment (which we ended up finding! Yay), Joann's was having a moonlight madness (or something to that effect) and their Simplicity patterns were all $1.99... I came back to New Mexico with less than I anticipated, but still more than my dear hubby wanted me to.

Along with a plethora of patterns (approximately 18), I also brought back a selection of fabrics I've had my eye on for some time... but never bought. Somehow, they stuck around Joann's roster long enough for me to finally make up my mind.

Among them was an eye catching galaxy print. The pattern may not be from this very recent haul, but I've been dying to sew it up since I bought it last year, but I kept flip flopping as to what I'd use for fabric, in my usual way.


This is New Look 6020. Princess seamed dresses with neckline variations, including options for clutch purses.


I chose view D, since princess seams and sweetheart necklines are, in my opinion, utterly timeless... like space! Heh... ok that was bad...


I was 60% convinced that this pattern would give me issues, particularly with the princess seams, what with the running disappointment that past New Look patterns have offered in ill-fitting dilemmas. 

This was not the case. 

This was a complete cake-walk. Other than my usual vertically challenged adjustments, this did not need anymore altering-- well, I did substitute the side zipper for an invisible one, and instead of 14 inches I opted for a 9 inch one. That being said, full bust adjustments are going to be needed for those of you who are well endowed. I stayed up all night to sew it up, though that was completely unintentional-- the sun decided to bring me back to reality while I was binge watching Orange Is The New Black on Netflix.

It's 6 am and I am heading to bed!
So, from when I started copying the pattern, making the alterations on my muslin, and sewing up the final garment, and of course pausing for long intervals to pay attention to what was going on... this dress took roughly 8 hours.

It was during one of those "I am paying attention to the good parts!" that Khan decided to lay and claw on my work, and got more than he bargained for.

Ouch. I know your pain, Khan

I heard a little yelp, and turned around fast enough to see him jump higher than I've ever seen him jump. This is not the first time he messed with my sewing projects, but it was the first time it bit back.
Thankfully it was just a superficial little pin prick he suffered, but it sure taught him what for. I thought for sure the iron would teach him the lesson, as he tried many times to nuzzle the plate while it was on, inching closer and closer each time.

When the night was over, little Khan and I retired to our safe and comfy bed... after I finalized the entire night with a few shots of the entire dress.


It's truly amazing what a little bit of eyeliner, a touch of red lipstick, and a quick pat down with some hair pudding will do to a sleep-deprived person.

Going back to the subject of having so many patterns, I came to the realization that at my current pace I will never sew and enjoy all these wonderful garments just waiting to come to fruition in my lifetime. So, for my 27th birthday (next week) I have decided to attempt to sew a garment a week at most, or two garments a month. It'll take tremendous efforts in time management (which I always fail horribly because I get hooked on gaming or show watching), but I am very determined!

Wish me luck!

Thursday, June 11, 2015

Mortem's Tricks or Treats: Sithfully Sewn

What would life be without our men.
It is with that in mind (and father's day around the bend) that I decided to show my man how much I appreciate him.

Not to say I don't always, with affection and all that gushy mushy stuff... but I don't always get around to making the things I plan to make him. That list in itself, is probably as long as my typical sewing queue.

This week is different, though. This week I was craving to explore a new(ish) territory-- I wanted to make him a functioning casual outfit. Not unlike the things I have made in the past, like his house shorts and bleach art shirts (which I have made plenty of variations since); these things are of a more... home bodied nature.

I went pattern browsing, in my usual way... only this time I was searching for men's patterns. Let me say this: there isn't a whole lot to pick from-- we women have it easy in the subject of sewing pattern pickin's.
What I ended up deciding I would make are the McCall's patterns 6973 and 2149. Pretty basic, as far as silhouettes go, but very "buildable". I chose view C from 2149, and view F from 6973.


My conclusion after this hearty endeavor is this: my man is incredibly difficult to sew for.
Not in the technical aspects, no... that part took all of maybe two days, which is probably a gross overestimation-- it was incredibly easy, I enthusiastically encourage all to get these patterns if you're hankering to sew something for your S.O. It was getting him to shop for the fabric with me, get him to stand still during fittings, and really just getting him to do the fittings at all; that was the hardest part, that part took dang near a week.

The things we do for love.


There's still some issues that I haven't bothered yet to resolve though they're very minor. The more important ones I've carried out-- they were caused by his short stature. I decreased wherever it was possible to do so; sleeves, bodice, legs.

The fabric was a happy accident, in more than one way.
I was wracking my brain as to which fabric I would use, something that would really accentuate his quirky and geeky personality.
While taking my pass by the Walmart's fabric section (like I always do when going grocery shopping), I saw a bolt of this most perfect Darth Vader print staring right at me-- at $4.95 per yard, it was a done deal. I got my cuts and went along my way. When we arrived home we recounted our receipt and noticed something peculiar... I was only charged for one yard of fabric, and I had gotten three. I probably should've gone back and disputed it but just this once I'd like to believe that karma smiled on me that day... so I kept it. I know tip for tap is wrong, and not the way karma actually works, but that very same visit, I dashed out to the parking lot to let the two men ahead of me at the check out know that they had forgotten a few sacks of their groceries.


Excuse the long tangent, but it was a nice and seemingly perfect accident. Anyway, I digress.
The lesser issues are the point at which the shoulders lie-- way off mark-- and the depth at which the buttons were placed. Perhaps the buttons aren't even an issue, particularly because they give him a little more coverage around his waist... but those shoulders are a blight to my seamstress-y ways. Definitely going to go into more detailing in the subsequent shirts. I'm also going to note, that the breast pocket needs interfacing; I hoped that the fact it was a kona cotton, that the natural body of it would suffice, but looking and looking at it, I'm not all that pleased with the finish of it.... maybe it's the square shape of it... I can't put my finger on it, to tell you all the truth...

The fabric really made the shirt-- the extra touches I added were not that significant. I contrasted the facing, so that the contrasting collar and pocket didn't look so awkward, like they do on the pattern image. I topped it all off with cherry red top stitching-- worthy of the sith lord himself.


Finally, the shorts! Since I am not new to pants any longer, I didn't find the shorts at all challenging... that is, until I got to the front fly zipper. What can I say, I have never done one before. I reread that section over and over again, until I finally caved and consulted Youtube. After that the instructions did make a whole lot of sense, hehe. I felt a little silly in fact. That side pocket became a little bit of a problem, only because I had shortened the length so much it was right at the seam for the inside pockets. I still don't like the placement; them being so close to the cuff and all... but it was the most logical because my husband did not want it on the front nor the back.
The only design changes I've made with these are the snaps to the flap of the side pocket, and the addition of the cuffs along the hem.

Perhaps I'll create him an outfit for the premier of the new Star Wars...hmm...


Saturday, June 6, 2015

Mortem's Tricks or Treats: Swooning Over Nightmare.

With all the natural dealings in getting a home to sell, I have been tying up the loose ends here in New Mexico. What that means for me is having more of my time off for myself during the time I wait for inspections to clear-- I'm so very close to finishing up all my obligations. Except for that Doctor Who scarf, and copying a few borrowed patterns, there doesn't seem to be anything else on my craft agenda.

In the last year, I garnered quite a collection of patterns and supplies for just the occasion when I am unbound by promises. Although, like many crafters, I am not exactly beginning at the beginning... because... well... I don't remember that far back into my personal project queue, heh. I am starting somewhere near the end, but not so new enough that I feel too guilty about starting with recent acquisitions.

Back in April, the shop I work at received a shipment of Nightmare Before Christmas fabric. Naturally I purchased 6 yards of it for my stash. I didn't know what I was going to use it for, at first... but who really does with their impulse purchases?
One thing's for sure, I knew I wanted to make an accessory rather than an article of clothing first from it...


A little earlier in the year I discovered Swoon Patterns. Just by looking at their front page, I knew I needed to try them out one day, and they offer just the opportunity in their free pattern page. The Ethel Tote appealed to me instantly.

My introduction with Swoon had me on cloud 9. 
My first bag came out so damn cute; I made it from Batgirl fabric and had given it to a good friend of mine. I wanted to make one for myself, but my purse needs require either backpack straps or cross body straps, and some closures-- nothing else.


Well, that meant modifying the original pattern to include all the extras I wanted. Instead of adding the straps to the front and back main panels, I added D-rings to the side panels and just made one long strap. 

I cut a strip for a little closure over the top opening, because it gaped way too much for my liking. 
I added a magnetic snap because I have never used one before and I thought it might be neat to make the closure a little more decorative using an embroidery lace bat pattern I bought from Urban Threads last year.


On my first purse, the thing that had slowed me down was the inside zippered pocket. As beautiful as it ended up, I felt like it needed just a tiny bit more explaining or even suggestions/tips on that part of the instructions.

Wrong side view.
Can't even tell there is something behind it, let alone the small square piece.
It basically asks you to guess the location of the zippered pocket piece that is laying on the front, while you're stitching on the lines from the wrong side.. but tells you to make sure there's at least half an inch on either side and top. So what I did my second go around, and to ultimately take out the guess work, was pin at the important points of the strip, so when I turned it over I now had my feeler edges.


I was then able to tell where the boundaries of the drawn rectangle were on the right side and align it all together with much more accuracy.

Other design details I have chosen to add was piping to the front pocket, along with fussy cutting it so that the design of the fabric remained a little intact. I used three types of fabric in total for this piece, which I am particularly proud of; opening up a pocket reveals a different fabric.

I am so very happy with this bag pattern, it's a very spacious and easy bag to put together; even to customize like I did. I completed my second bag within a viewing of Hitchhikers Guide to the Galaxy, heh-- that's how all crafters gauge speed of completion, amirite? The instructions were pleasantly easy to read and follow-- it gives me so much hope for the time when I'm ready to purchase their other luscious bag patterns.
I have my eye on that blanche barrel bag... 


Thursday, June 4, 2015

Spooky Basket: Oddball Sewing Essentials.


The list of sewing essentials will differ from sewist to sewist. I have personally made lists for notions you can make, notions you can buy (here and here), and notions that I've thrifted.

Lists are fun to make-- especially sewing related lists.

I also understand that most of my lists comprise of items that are typically not in everyone's budget at the start, and in the best of cases not exactly "essential" (but really, if you had the chance, you should buy them because they do make life so much easier).

When I first began sewing, and I mean seriously about it, my sewing box had some oddball things I had reclaimed for the purposes I needed in order to get my sewing done.

Sewing is funny that way; you think you'll never see a need for something until you actually come upon the circumstance which simultaneously gives you that ahh-ha and aww-darn, gleaning to the ohhh hey moment.

The sewing stiletto.

Marti Michell
You've probably seen various types of stiletto awls, from the recent bamboo variants to the mother of peal handled antiquarian commodities. I first found its use when I began working with tiny/fiddly seams that required a close encounter with the needle and my finger-- like those found when working with lightweight wovens that you can't exactly iron without ruining.

To this day, I have not given up the convenience and price of a manicure orange stick. These are literally available in any dollar store in the world, and the added bonus (a recent revelation, thanks to pinterest) of potentially having toe separators that I use to store bobbins.

Sewing Machine Cleaning Kits.


Amazon.com
Most universal cleaning kits will look like the ones above-- they'll have some machine oil, some screwdrivers and a basic stiff brush.
Since a sewing machine has more tight crannies than a natural cave, this just isn't enough. Eventually dust and fluff will accumulate in the deeper crevices where you can't really reach with the basic tools, effectively lowering your machines efficiency... it might even break, and you might assume its the quality of the machine when that might not be the case.

Included with my basic cleaning gear my cleaning kit has:

  • A feather powder brush (mine came with shimmer powder from Quo makeup)
  • A head lamp 
  • A dental pick set
  • A spoolie brush
  • Microfiber lens cloth


It's difficult to locate an exact source for the feather powder brush with the thin pliable shaft I have, but it looks just like this and is of the utmost use when cleaning out a machine that cannot be sprayed with canned air.

Anna Sui
It appears Anna Sui once made one called the 'Finishing Brush' but has since been discontinued. A fingerprint brush might work well, but I have never tried it.

A headlamp is another essential tool for cleaning because your machine should obviously be off when you're digging around inside, but it's a little cumbersome trying to angle a lamp or juggle a flash light in such a situation; it wouldn't be a hard to see area if light were able to reach all spots of a machines innards easily.

The dental pick set is great to reach in even harder and more delicate areas of your machine; I use the scaler to grab little lumps of oily lint, and the mirror to guide me around. I found my set at the dollar store, it included a tooth brush which I also use for cleaning mucky gears.

I use a spoolie brush for areas that need all around cleaning with very little side to side movement, such as the bobbin race.

Lastly the microfiber lens cloth, because it doesn't leave lint behind like a regular cloth. Heh. I get one free every time I get a new pair of glasses.


Pattern Paper.


Amazon
This is one I am always asked about, and I am honestly shocked every time it happens; where do I get my pattern paper?
It would be nice if I could afford yards and yards of the stuff with grids and dots on it, but I waste and use so much of it I have to turn to more economical choices.
I use simple and plain white gift tissue, meticulously glued together with an equally plain glue stick. Seriously.

Since I never cut into a purchased pattern, I make a point to copy it onto tissue paper-- the tissue paper also makes it easier when you're making adjustments of the pattern pinned onto yourself or your form, or you're turning it into a sloper. Once my adjustments have been made, and I consider the pattern tried and true, I glue the altered piece onto thicker paper with a spray on glue for continuous use and abuse. I get my tissue paper at the dollar store, and I had purchased a large roll of butcher's paper from some supply market that has so far lasted me going onto 2 years now. It's very very cheap, so I don't feel bad if I mess up.

Ok so my list isn't that odd or even that exciting... if not for the fact that so few of the ladies I encounter at the fabric shop realize these little tidbits, you might even call them simple.

Share some of your own "reclaimed" sewing essentials in the comments!

Related Posts Plugin for WordPress, Blogger...