Showing posts with label skull. Show all posts

Saturday, May 25, 2013

Skeleton Closet: New Look 6078 Pattern Review + Outfit Post

After a decidedly frustrating time working through my mock up, the final blouse didn't actually take long to finish up; approximately the entire length of Klimt from my Netflix instant queue (which by the way was a little underwhelming for being inspired by such a great artist)...


I guess that's not the only underwhelming thing... I feel a little underwhelmed by the blouse after completion--perhaps it's because of the strenuous effort it took to get to the finish line.
Because of this blouse, I had to buy and improvise many tools; my paper tape dress form, and seam roll for example.


In retrospect, this blouse didn't really need that much work, but I am a terrible stickler for finished details; for my own peace of mind, it was done; I don't like a homemade appearance in my own work.
Of course, I'm not so anal that after said work was done I ended up taking a nap while wearing the blouse, and afterwards deciding to take these photos... it's quite wrinkly on the back. Heh.


The fabric is on the sheer side, so an undershirt is a necessary aspect to this outfit; it's far more see-through than one would expect; it makes a great start to a new summer wardrobe.
This was also a chance to try out the button sewing function of my sewing machine-- I didn't feel like hand stitching 9 buttons, and without a simflex, it would probably have turned out much more off than it is now...

Dangit, I really wish I had a simflex...
In the above picture, you can really tell the button plackets don't exactly align, but luckily, now that I know how to use a button attachment it won't be so daunting fixing it.


 Here are my final notes on the construction of size 14 of the pattern, in no particular order:
  • Bust dart needed about a 3 cm raise from original position, and a 2 cm increase in length
  • Took in upper bodice pieces by a few cm total.
  • Front darts decreased in width by about 2.5 cm
  • Finish bottom seam, and reverse placket installation from instructions; makes a far cleaner right side.
  • Baste on placket before attaching collar-- you can get a better gauge at where your collar should be sitting at. Remove basted placket after pinning collar; sew collar on.

I am very pear shaped, meaning my bust is small, and my hip area huge. These alterations are meant to accommodate my shape, but I found that the collar would likely need adjustments in any size because it's so terribly drafted, as well as how the instructions tell you how to insert your button plackets.

What I am wearing:
  • Top: Self-made from New Look pattern 6078
  • Shorts: Second hand
  • Boots: K-mart

Tuesday, November 20, 2012

Mortem's Tricks or Treats: Handbag Craze

My old bag has lost its luster... I have been looking fervently for something that brings back some pizzazz... and the only bag that piqued my interest was the ribcage purse from Restyle... I'm sure many of you have seen it, but if not, then have a look for yourself here.

I love things with rib cage imagery, but alas... no money has stopped me dead in my tracks once more.
So once again I took a dive into the creative abyss I call my brain...
I needed black, I needed lace, I needed something "gothy"!

So, my lovely readers, I give you a peek  of what I have been conjuring... it's really more of a peak, but anyway...


Now it's not finished! I still need to add that last strip of venetian lace on the top, and secure what looks like a white blob in that picture, but is really a resin replica bat skull.


It's going to be nestled in between the ribbon flowers.
I didn't have to spend a dime on a single item, since most of it was hand me down materials or scraps from other projects... this project made me realize how unorganized I really am. I really had to dig deep to find it all. It's sorta, kinda lined... the inside material is patterned, but it isn't exactly a lining that hides seams (oops!). Next time it will.

But anyway, this was a trial bag to test out my pattern before the real treat... I'll still post pictures of the finished bag! So don't you worry.

Tuesday, July 24, 2012

Skeleton Closet: The Vintage Vest.

I always seem to have this issue of not feeling like I look goth during the summer months despite wearing black all over. So as often as I want to, I'll be posting up my outfits for the public to decide whether it's just black clothes or gothic summer time flair.


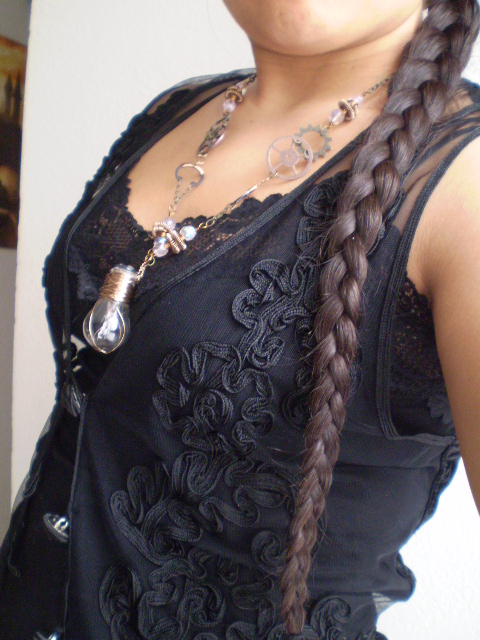
Last year while I was still living up North, I came upon a vintage shop downtown called USED-House of Vintage. My build is teetering on the larger side, so despite finding many beautiful things my thick ribs and small bust kept making fitting situations awkward and tight.... until I saw a little piece of awesome peeking out from a chest. When I uncovered it, it was one of the most beautiful vests I've ever laid eyes on and it fit!


It is from a company called DAM American Concept; I haven't done much research into it, and a quick google search yielded nothing of note.
It has a mesh front with a floral pattern sewn onto it with ribbon. The back is velvet with a lacing detail to cinch it. The buttons are tattered and I am not really fond of them-- but I haven't found buttons that I'm happy with to replace them.


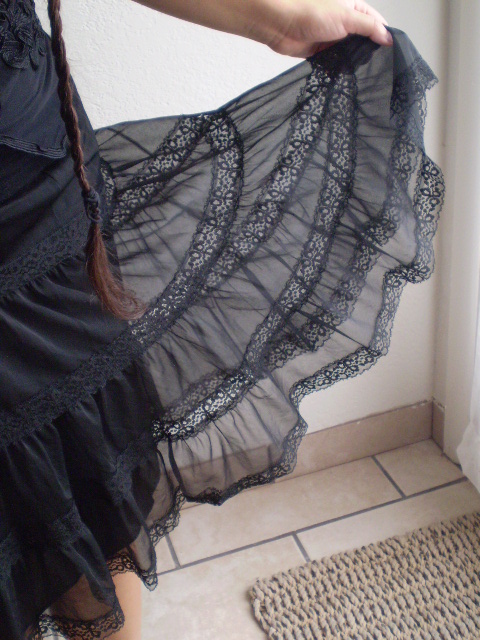
 In this outfit, I incorporated the vest with a cotton black camisole I found at the thrift store by Urban Behavior, and another thrifted find being the black mesh and lace petticoat found at the same thrift store as the vest. I got the beautiful semi-flats at an outdoor fleamarket with my husband years ago, but I've seen the style bounce around in stiletto-pump form.


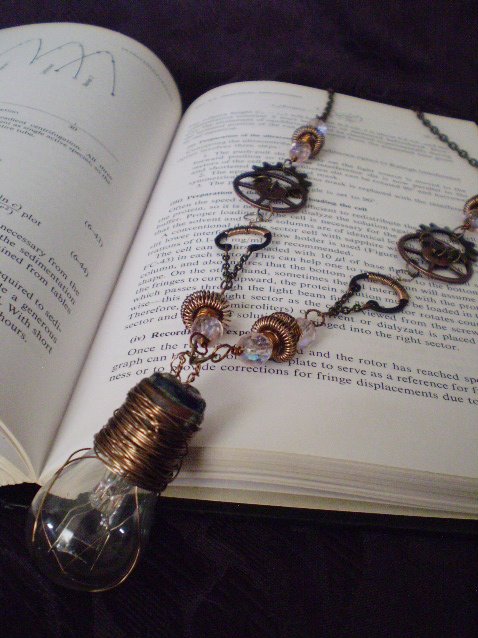
To top it all off I wore a hairbow and necklace I made.

Obvious steampunk influence

So... Goth or not?


Mortem's Tricks or Treats: The Rockabilly-Kitsch Apron


 I recently became the owner of a brand new piece of household machinery. The SE400 Brother Embroidery/Sewing machine.


 It's simple and rather limited as far as embroidery machines go, but profoundly fun to noodle around with above average home use.

Or so I assume!...

I've only had this machine for a little over 2 weeks now, so I haven't quite explored all its features and capabilities.
Add to the fact that all my supply and materials are back in the snowy North; I have very little to really acquaint myself with this machine.
But having a wonderful and concerned husband, he drove me to buy a little bit of materials in Flagstaff.

If anyone I know is reading this, they know that the minute "buy supply" crosses my head, suddenly everything turns hazy! Any idea I might've had floats away into oblivion. So he patiently waited as I strolled through isles pulling out bolt after bolt of fabric and trims... that is until the third run through...

He got fed up and grabbed some day of the dead fabric he saw me purchase before, and told me that THAT was what I was getting-- now match it!

Easy enough! I grabbed a prepackaged quilting square of purple fabric, and matching pom pom trim; which in all honesty, piqued my interest at first, and the reason why it was sooo easy to make the matching decision. He and I mesh so well... *end sap*

I'd like to add that there were a myriad of more useful things I could've made-- at the store with the fabric, I had no idea that an apron was what I was going to make with it all. But as the people who know me know, I love to cook gourmet! (my personal and secret blend of herbs in my fried chicken, and roasted garlic and herb scratch burgers topped with my own secret sauce are favorites amongst my husband and his co-workers!) And when my cauldron in the kitchen starts its bubbling I create quite the mess. So it almost came to me instinctively to make the apron.

Back at home, I was having issues with my rather large spool failing to fit on the rather small holder on the machine; I always stock on large serger spools of black thread because I go through it faster than I do a case of vanilla cola.
After tinkering a little trying to figure an easy way to use it, I decided to go digging through items in the house that I could fashion to serve this need.
So I came up with a cutting board holder with removable pegs, some various paper clips, and some duct tape....

Minutes later, I had MacGyver'd myself a spool holder:
Necessity breeds ingenuity!
I didn't tape the pegs down in case I needed to move them over to use it with a twin needle later.
And after some needed time getting to know my machine, I realized that I spent more time smiling and having fun than I ever had with my previous machines. I never had to unstitch and redo seams at all (a problem which at first I thought was me and a lack of sewing skill!)-- it was bliss. I drafted the pattern for this one myself, using container lids and other such tom foolery, as I don't ordinarily work with premade ones.


P.S. I've decided to help any potential readers skip my "fluff" entirely in regards to my posts. Keeping my titles relevant to the body of the post. Creepy Craft Crusades is the title I will use when the post pertains to my love affair with crafts.

P.P.S I use post script too often already! Hah! 

All images and designs copyright Madame Mari Mortem©. Do not copy or reproduce without the explicit consent of the owner.

Related Posts Plugin for WordPress, Blogger...