Wednesday, May 15, 2013

Skeleton Closet: Humpty Dumpty Sat On A Wall...


I know looks can be deceiving, but I'm quite usually very stoic. I haven't really considered myself the type of person that is prone to fits of rage, so when I am raging you can be quite certain that it's been a subject that is long standing.


Although the hub and I are more optimistic than pessimistic, the source of my rage has been some recent news (literally a day after we signed papers for our new apartment--great timing!) of a new policy that was brought into light that may or may not get in the way of our move. In other words, there's a possibility that we'll be staying right where we are for a while. The idea of staying longer in a place that not even family desire to come visit is unbelievably disheartening.

So instead of packing, we're waiting... and waiting... and waiting...

Meanwhile, I've been doing something about the distinct lack of storage and shelving in my life.
I found a small plank of wood while on my way to the hardware store for my dress form, and turned it into an impromptu solution to my scissor storage:


It's mountable on the wall, but since I don't want to place anymore holes in the wall (the move may still happen!) I haven't done so. You don't need a drill to do something like this, hell I didn't, just a lot of elbow grease and a bit of hardware.

What I am wearing:
  • Top: Thrifted
  • Skirt: Self-made
  • Waist belt: Fairweather Co.
  • Choker: Self-made

Thursday, May 9, 2013

Spooky Basket: The "New and Improved" Tailor's Board by Dritz

As promised, my first sewing related product review!
And I'm sorry to say it's not a rave, but a total rant...

Not too long ago, Joann's began selling Dritz's new and improved tailor's board for a whopping $49.99. Naturally, since this item is a rare and expensive commodity on it's own, I squealed when I saw that this version by Dritz also boasted an integrated clapper; the price of a clapper is roughly the same as the board itself, so it looked like a deal.


I'm not prone to impulsive buying of tools without first doing research on them, but I had a 50% coupon that was a day from expiring so I jumped at the chance to buy one of these from Joann.com; there wasn't any way I could make time for a visit before that expiration date. So then it was just a matter of waiting...
I was attempting to research during this time, and not finding a speck of information on it-- not a single review, a post, nothing!

I began to get a little worried.

Finally when my package came, it was all clean and pretty on the outside... but as soon as I opened it and emptied the contents, the box in which the board came in was torn and battered looking-- like they had just beaten the old box and packed it in a new one. I took the board pieces out and discovered that the screws were all missing; it was lucky that we had enough properly fitting screws at hand.

That started me off really sour and contemplating returning it...
As soon as I began assembly, I began seeing the real sour grapes to this deal. The wood is poorly cut so the pieces are not flush against each other, and the holes were drilled terribly inaccurate.
When the board was finally constructed, the clapper refused to go into the slot it's supposed to fit in. I checked to make sure it was properly put together, and indeed it was; once again the inaccurate cut of the wood made it a chore to pull and put away the clapper.


The clapper itself seems of very little use-- it does not have enough weight to serve properly as a clapper; it seems only good for maybe two layers of light to medium weight fabrics... a total bummer...


It's supposed to glide in and out of the board, with only magnets to hold the two together while not in use; but the pieces are so wedged I don't even bother to "conserve" space, as it says it would do if put together.

The good thing about the board is that it does do the job it's supposed to; the edges will all find a use eventually, so at least this wasn't a total lemon of a purchase.

My eldest brother has kindly offered to make me a custom tailor's board and clapper with point press-- I'm eagerly looking forward to having truly functioning and sentimental pieces!

Mortem's Tricks or Treats: My Not-Quite-Really-A-Doppelganger-- With A Little Extra

Just minutes before getting touched up
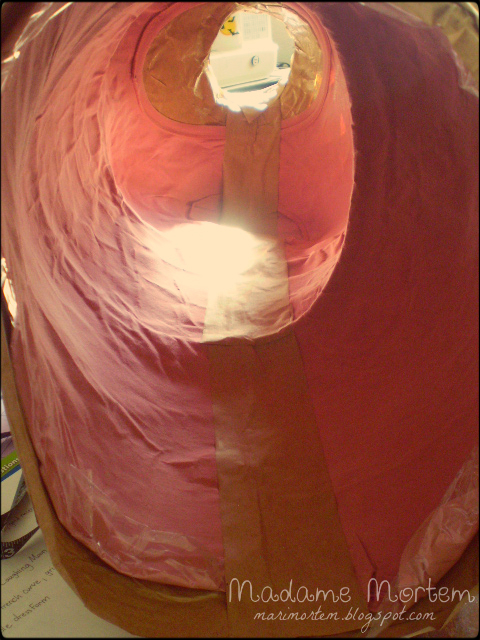
Meet Frankie. My almost-but-not-quite doppelganer-- and I really only say that because I'm not made of pvc piping, paper and glue! Though she measures up pretty well-- only a centimeter or so off.

She costed me roughly $21.00 and three days to construct (not including the first initial waiting it took for her materials to be mailed to me)... three, because I didn't have the materials to make her stand up until today, which halted the process of completing her in other aspects not only just to add that finishing touch. So if I had to guess how long it would really take? Probably a teeny bit less than two days.

Well hell, I began using her after being freshly cut and dried off my body. Like I said in the previous post, paper tape holds its shape pretty well even without filling and such; it's essentially a lesser form of paper mache.

One of the best things about making your own form is the laughs that come with asking your friend to help you with such an endeavor; doubly so when the aid of your significant other is needed to "grope" and "cup" the more intimate parts as they dry to keep their shape true to form.

Yarn is just for good measure.
Indeed, good memories were made as well as lessons well heeded: wear the tightest fighting articles of clothing you can that you don't mind getting cut up. I found a pink shirt at the thrift store that none too flattering exposed my "rolls" if you may; the tights/leggings were bought at the dollar store. Nothing was missed.

Another good bit of advice, courtesy of Lulushion? Don't cut any handmade form from the center back, cut it instead from the side. It is considerably more tricky (and requires a lot of trust, especially around the neck area), but it helps to lessen the inaccuracies. Imagine if someone were to cut your spine in half, why you'd buckle and deform, too!


For the stand, I simply used a variation of Lulushion's tutorial on making one with PVC pipe; only mine is not adjustable at all, since I don't think I'll ever grow much even with heels... compensation for a slight height change is easily done, I feel. I also used a hanger and some tape for the upper inner portion.
She was then filled with shredded paper, not scrunched; it fills it up a lot better and gives it a decent weight so she won't blow away with a gentle gust of wind.


Ok, so onto the extra! I have yet another easy and great tutorial-- a supplement to making a paper-tape dress form (or duct tape).

An Integrated Pincushion

Since I have no desire for making her a pinnable cover (because I rarely, if ever, pin to the actual form), I decided the next best thing is a neck hole pincushion.

Materials:
  • Left over cardboard
  • Foam
  • Polyfill
  • Scrap fabric; size dependent on size of pincushion/neck hole
  • Hot glue gun
  • Uncovered neck hole from your newly made form
  1. The final step to assembling your dressform requires that you measure out a piece of cardboard and top the hole with it before taping over it to seal. Before you get to that step first cut out a hole within that piece of cardboard.


  2. Then clearly have one mark on both pieces, so you can align them together with no gaps.


  3. Next grab a piece of foam (sorry no photo of this step) and hot glue it to the inner piece of cardboard you cut-- trim upwards so that no foam is sticking off to the side.
  4. Plop a piece of polyfill on the top of the foam, and then proceed to place the fabric over it all.

  5. Glue it on pulling tight as you go; begin by gluing the opposite ends to achieve the best tension (again, no photo of this step--sorry!)
  6. Once finished, begin to push the pincushion through the ring, aligning the marks. Don't push it all the way through, there should be a bit left behind, like shown.

  7. Use your hot glue gun to apply glue along that inner edge to seal the two pieces together.
  8. Then it is a simple matter of applying your "pincushion" to your form as usual.

And you're done! Pretty simple and clean looking (exactly like a mason jar lid pincushion); it also adds a dash of personality to your new form.


Happy Crafting!

Update:

Frankie has been getting some work done on her figure.
I drew as much as I could conjure in such a short burst, but now I've run out of steam; she'll have to wait till I feel like doodling again. For now, I give you Miss Frankie Stein anew.


I am debating whether she needs a skeletal spine on her back...

Monday, April 29, 2013

Mortem's Tricks or Treats: Mortem's Favorite DIY Notion Links

There are certain tools that are essential when it comes to endeavoring into garment construction.
Over the years I've learned that some things are just too important to get into the habit of using and doing, than to progressively invest in them over time. The thing about garment construction is that it's face value is pretty much how it always is; you either don't like the idea of spending hours fussing at the machine and ironing board, or you're really passionate about it. I would lump "casual" sewists into the latter because lots of love and time was spent getting to that point-- even if you feel like you can only make skirts.

The price of these particular tools are exorbitant-- vintage, used or new; it's enough to put off the novice into thinking it isn't a vital tool to have. What's more, with the lack of quality inherent in the market, it is in fact cheaper in the long run to DIY; as an individual you're able to learn from your mistakes and transcend them, whereas the quality of store bought usually tends to remain stagnant for long periods of time.

Here is a brief list (I could go on forever about essential items) of some basic tools you simply should not be without for sewing clothing-- and the best links on how to make them yourself:


  • Pattern Weights: One of the things I commonly find is that many teachers hammer in the idea of using pins in sewing. Pins are good, mind you, but not for everything in sewing... a good example of where not to use pins is pattern cutting-- enter pattern weights. These heavy little bundles of nifty keep the pattern and fabric together quite flat and accurate; I love to use my rotary cutter and mat as I find it the most precise way of cutting out patterns. If you don't have a cutting mat, than simply trace with marking chalk then cut it out with shears.                   
Woman of 1000 hobbies Instrutables
The only thing I would add to this tutorial is more washers to each bundle for more weight; hot glue them together and proceed as written.
  • Wrist Pincushion: Before I figured out I needed one of these, I had been jumping back and forth to my pin bowls; the one by my machine, and the one at my table; going to refill one from the other. Once I had my dressform, it was more of a pain to reach out for pins.
Ruffles & Stuff + Tea Rose Home
  • Pressing Equipment: pressing and ironing is to sewing as heat is to cooking. If you're not doing them together then chances are you're not achieving the greatest results. They say that you spend as much time at the ironing station as you would at the sewing machine; I find this to be an unequivocal truth-- and the right equipment for the job makes all the difference.
Tilly & The Buttons Tutorial

Tailor's Ham:
a fundamental tool for pressing darts of all kinds-- how can you ever sew a garment without one?! The ones that dritz make are very run off the mill and affordable, but they tend to fall apart not too far along-- so in reality you'll end up having to buy more, meaning you'll have to spend more. The pattern also comes with a contoured ham, which helps with rounded seams. You'll need a ham holder to go with the ham; you might find that they're more expensive than the hams themselves, but a great and almost-always-inexpensive alternative is a football kicking tee.
Seam Roll: Perfect for pressing long or tricky round seams, like in pant legs or cuffs. Dritz also makes one, but has the same pro's and con's as their ham.

The Curious Kiwi
 Tailor's Board: Probably the most intimidating pressing tool is the tailor's board. This tricky looking piece of jumbled wood is probably the best item you could have in your arsenal-- it gets to the even trickier parts of garments such as pointed collars and highly curvaceous seams. Dritz makes one that has an integrated clapper that I currently own, but sadly it's quite pricey-- truth be told I am not entirely in love with it either. I'm hoping one day I can make my own clapper and board separately and from more quality and heavier wood.

 Sleeve Board; This has one use that you can probably guess-- yup, sleeves. You can press the entire length of a sleeve on this baby without worrying about leaving leftover creases. This blogger also offers an alternative template/pattern for the tailor's board.
The Curious Kiwi
Don't forget about the importance of pressing cloths to go with your newly made pressing equipment! Uncolored silk organza, and 100% plain uncolored cotton are the best to get; high temperature tolerant and not at all abrasive to even the most delicate fabrics-- the organza allows you to see through to your work being pressed, and won't leave a shine. An added tidbit; if you find yourself wondering where on earth you might find solid wood sawdust, there is another equally good product, albeit pricier than sawdust; ground walnut shells, which is commonly used for iguana bedding-- crafters also use it for filling pincusions!

  •  Dressform: An invaluable tool, but also can be quite a pain finding the most accurate one for less than the price of your eyeballs. There is the commonly known duct-tape version, which I have had very lumpy and flimsy results with... then there's the brown paper tape method. It doesn't lose quite as much shape after it's dried and ready to come off.
    Threads Magazine Tutorial
 Although finding paper tape proved to be the most tedious task. This article also happens to have alternative DIY dressforms with a tutorial on making your own dressform stand. I'd still stuff the form once it's finished, FYI. Side-note, the magazine itself is a fine morning read. 
Update 05/04/2013: I found this blogger via the Threads comments who has shared in depth the casting method of making a dressform, which also includes instructions to create an adjustable stand to go with it. Casting yourself seems like a much more accurate way of acquiring your true "double"; I have a strong itch to try it! Go see for yourself at LULUSHION.

I realize that the tailor's board and sleeve board DIY may not be a viable choice for everyone; it wasn't for me, since I don't have the tools to make them... I ended up couponing my own tailor's board from Joann's, and found my sleeve board for .25 cents at the thrift store; I don't presume to know if the shops and sales are quite the same elsewhere in the world, so I can't say waiting for coupons are viable as well. My hope is that somehow more options have been realized, and that starting up good garment sewing habits doesn't have to be a totally arduous endeavor, and can actually turn out quite fun and inspirational little sewing room equipment. I plan to write up my own tutorials, reviews and tips about sewing notions in the future.

Happy crafting!


Fashioning My Cyber Microcosm: Final Challenge Update

Although this post may be brief, I felt it needed it's own page; it is after all the wrap up post to Ms. Misantropia's inspiring challenge.

To recap from my intention post, I wanted to:
  1. Unclutter the house.
  2. Find inexpensive ways to do something romantic and fun with the hubby
  3. Rearrange and organize my craft room
I'm very happy to say that my entire list received much needed focus and love. I have successfully uncluttered my home (although thanks for this can also be given to the fact I am moving), I have found a few inexpensive ways to do something romantic with my husband, and finally as you all know, my craft room is better than it ever was.

Part of what my hubby and I have been doing to add a little spice to our relationship for our meager meager budget: 
  • We unearthed his collection of Magic the Gathering and allotted some time each week to play.
  • Once a week we went for the dollar sundae's at McDonalds and watched the sunset in the car while chatting
  • We went stick hunting around the desert for one of my projects; he enjoyed it much more because there was a main purpose to all the walking and effort.
  • We dragged out our air mattress and slept in a different room of the house; it is surprisingly romantic and fun, heh.
  • We grabbed a book we both wanted to read, and read a chapter to each other before going to bed; we're currently reading The Foundation series by Issac Asimov
  • Star/moongazing-- always a fun one to do, especially now that it's heating up and the night sky is super bright. Plus we're finally breaking in his binoculars.
  • Uncluttered the house together; lots of junk and lots of memories jumbled together-- it was quite fun sifting through it and reminiscing. 
I really hope I can keep all this up, and think of newer and better ways of improving; I'd hate to go back into a rut just because the challenge is over... but c'est la vie-- or at least mine, anyway. Heh.

Tuesday, April 23, 2013

Mortem's Tricks or Treats: Old Mouse Pad Into New -- DIY Tutorial


No blouse today. Again.

*le sigh*

On the brightside, I've been feeling heaps better and still really itching to craft. I know, I know. I wouldn't say I'm lazy, but surely I have a fierce propensity to procrastinate... especially when there's so many things I wish to do at once, and one project is taking up more time than it should.

So in order to treat you all, (and also alleviate some of the guilt) I have a tutorial I'd like to share: turning your old, ratty mouse pad into a new and awesome one! I've been wanting a new mouse pad, but could not find one that reflected my tastes for less than $30. And I thought to myself, why not craft one myself? I have the stuff and the know how, plus I could make other matching accessories later with endless possibilities!


Onto the tutorial....

What you'll need:
  • Scissors-- fabric and utility (I know, it's rotary cutter up there)
  • Fabric of choice
  • Old mouse pad
  • Marking crayon/chalk/pencil
  • Fabric protector spray-- I use Scotch Guard's fabric & upholstery type
  • Fabric adhesive-- either heavy grade iron on ( I used Heat n' Bond's ultra hold), or spray (shown but not used is Elmer's multi-purpose Craft Bond)
1. To begin, trace the outline of your mouse pad onto your fabric like so... I used chalk because it gives me the right amount of allowance needed for this particular project. It's better that the mark isn't flush to the pad for this step; you'll see why further down. Cut it out as accurately as you possibly can, leaving a crisp edge; this is why I prefer rotary cutters to scissors for cutting fabric.


2. Then you're going to take that circle, and trace it onto the paper side of the iron on sheet as close to the edge as you can-- this step has to be flush. I like using pattern weights because it really helps to keep the fabric from moving around too much as you trace


3. Now, you cut out the circle from the sheet. Your pieces should be nearly identical. Proceed by following the instructions on the labeling of your iron on adhesive, to adhere the sheet to the fabric as evenly layered/together as possible. All iron on adhesives require you to iron it on the back side of the fabric.
You should now have one piece that has the fabric on one side, and the paper on the other; like this...


4. You'll notice that fabric and paper are peeking out at both sides of the piece; this is alright, because now you're going to peel that paper off and reveal the iron on side...


5. Align the fabric on top of the old mouse pad as evenly as possible. There should be even allowances going past the edge of the old mouse pad-- do not put an edge of the fabric to the edge of the mouse pad.
Now iron it on as per instructions once you align it all properly.

Be really careful not to over iron this type of adhesive because you can end up burning it off, rendering the bond useless (not to mention stinky).
Check and make sure that the fabric doesn't come up from the edges easily. Having the allowance makes sure that your bond is flush against the old mouse pad, with very little chance of coming up.


6. Finally, trim your allowance and spray two thin coats of fabric protector spray. This ensures that the fabric you've chosen will suffer minimal damage and stains over the use.

And you're done once its dry! A nice new-ish mouse pad to adorn your computer area!


Alternate adhesive instructions:

I apologize for the lack of photos for this version, but anyways:

Follow step 1 of main instructions.

2. Then you're going to spray a light coat of adhesive to the backside of your fabric, and to the top side of your mouse pad. Let it briefly dry so it becomes tacky.

3. As accurately as possible, align the two pieces together with the allowances all around just like in the main instructions, making sure not to wrinkle the fabric as you stick the two together. A brush over the top with a card or ruler will ensure that there are no wrinkle bubbles and such.

4. Place some heavy books onto the top of the pad and let dry over night. Check to make sure your edges don't come up; apply more if needed and that dry over night again.

Once it's all nice and snug and dry, proceed with step 6 of the main instructions.
Then you're done!

Enjoy and happy crafting!


Sunday, April 14, 2013

Mortem's Tricks or Treats: Sweetest Temptations...

Oh my...

I failed. Not miserably, but I certainly caved in dear readers.
As most of you already know, there were two things that seemed pretty clear about me as of late:
  1. I get confused with commercial patterns and prefer to make my own; I did make an attempt here, but ended up completely altering the look of the pattern entirely. I haven't worked on it since.
  2. Big one here. I was not to spend any money, whatsoever, on crafty supplies...
Well... that all changed today, and $15.00 (technically $13.00) later I have all this. Buttons, and fabric, and patterns... oh my!


Both yardages of fabric are light weight cotton, perfect for the tops of both the New Look patterns. One has a nice crushed vertical pattern, and the other is plain. A veritable steal for the price, I say, and just in time for the coming hot months.

My neighbor kindly purchased me an assorted bag of buttons.
They do quite perfectly because there's enough in each set to make 5 button-up tops! I was so afraid I'd have too much randomness in the bag, but it turned out to be quite fruitful; $2.00 for all of these! I'll have to keep this in mind when I need more simple black buttons.

What prompted me to buy the patterns, you may ask? Well, have you seen them?!
I simply could not resist the temptation of visiting the craft section during my monthly grocery visit to Walmart.

I was so enthralled with view B of this Burda Style pattern, I adore the stylization of this top; I remember having a few of them back in Canada, purchased at various thrift stores. I've tinkered with the idea of making my own, but never found the motivation to do it... until now.

For about $2.00 per New Look pattern, I also could not resist this cute little slice of chic. One thing struck me though, view D and E are identical (the one the model is wearing)... I don't see why they differentiated the two-- perhaps because of the pattern of the fabric? But the cut is the same... puzzling. I planned on utilizing some Halloween fabrics I have in my stash; I was going to use them for other projects, but as soon as I got my crafty fingers on this pattern, I decided they'd be better put to use as clothing!

Finally, my absolute favorite of the three, this is truly a gem. Even if I cannot muster to decipher the pattern instructions, I feel adept enough to figure out the pieces on my own if push comes to shove. Just look at those choices! Ugh, I simply can't decide which one of these I want to make first when I manage to gather all the materials!

So, remembering I already said I'd make a peplum top, I decided I'd better update that statement.
In light of this totally unnecessary but oh so good purchase, I am going to make one of these tops. It's likely going to be view D-E from 6078.
I have some rick-rack ribbon and two choices of fabric in my old stash for my first commercial-pattern made article:


I'm leaning towards the candy corn and spider webs...

I'd love to hear your vote for which fabric to use-- Skulls or candy corns?

And also, because I never get to use meme's, let alone Star Trek inspired...

Oh, readers, you have no idea the size of the Trekkie in me... perhaps one day I'll tell it all.
Related Posts Plugin for WordPress, Blogger...